Notions to Know: How to Sew a Buttonhole

In this post, I covered how to sew on a button by hand. But we all know a button is not very useful without a hole for it! So how do you sew a buttonhole?

Many sewing machines come equipped with a buttonhole stitch and foot. If your machine has this function, sewing a buttonhole is as easy as a little set up and pushing the pedal according to your machine’s instructions. If not, there’s still hope for you!

This post will teach you how to sew a buttonhole using a simple zigzag stitch.

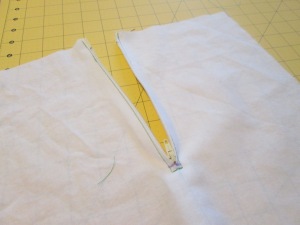
First, mark your fabric where the buttonhole will go. The length of the hole should be just slightly longer than the width of the button. I’m using a 5/8″ button, so my hole will be just longer than 5/8″. When you do this on a real craft, you’ll want to use something easily washable like tailor’s chalk, because buttonholes usually show on the finished product. For this demonstration I’m just using a fabric marker.

Working with sewing notions is important for a beginner learning how to sew a buttonhole - Sew Me Your Stuff

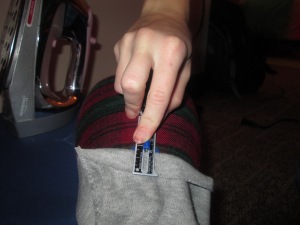
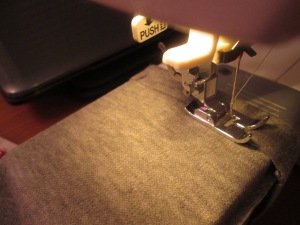
Next, set up your fabric in your machine with the regular presser foot. It’s wise to use interfacing before you sew a buttonhole to stabilize the fabric, but for this demonstration I’m just using two layers of cotton fabric. Start with the top of the hole below the needle.

Working with sewing notions is important for a beginner learning how to sew a buttonhole - Sew Me Your Stuff

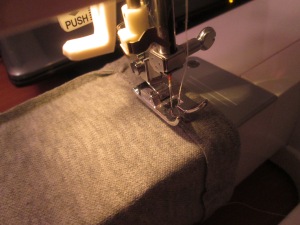
Set your machine to a wide zigzag stitch, with a stitch length of 0. Sew a few stitches and then stop.

Working with sewing notions is important for a beginner learning how to sew a buttonhole - Sew Me Your Stuff

Adjust your fabric so that the needle is just to the right of the mark. Set your machine to a narrower zigzag stitch with a short stitch length (but longer than 0) and sew the length of the mark.

Working with sewing notions is important for a beginner learning how to sew a buttonhole - Sew Me Your Stuff

When you reach the bottom, repeat the wide zigzag stitch used at the top.

Working with sewing notions is important for a beginner learning how to sew a buttonhole - Sew Me Your StuffWorking with sewing notions is important for a beginner learning how to sew a buttonhole - Sew Me Your Stuff

Now position your fabric so that the needle is to the left of the mark. Stitch in reverse with a narrow zigzag stitch and a short stitch length.

Working with sewing notions is important for a beginner learning how to sew a buttonhole - Sew Me Your Stuff

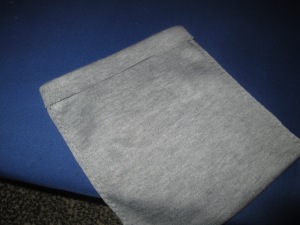
Now cut your thread and pull the fabric out of the machine. Using a seam ripper and/or small scissors, cut the fabric on the mark. Be careful not to cut the stitches!

Working with sewing notions is important for a beginner learning how to sew a buttonhole - Sew Me Your StuffWorking with sewing notions is important for a beginner learning how to sew a buttonhole - Sew Me Your Stuff

Now your buttonhole is ready to go!

Working with sewing notions is important for a beginner learning how to sew a buttonhole - Sew Me Your Stuff

Happy sewing!

Learni.st – Learn how to sew starting from step one
Pinterest & Twitter – Follow for tips, ideas, and more
Etsy – Shop Sew Me Your Stuff

Notions to Know: How to Sew on a Button by Hand

Buttons are an extremely common item that we’ve all encountered. And if you’re like me when I started sewing, you probably have a basic understanding of how a button is attached to fabric but aren’t sure exactly how to sew on a button for yourself. It is a very handy skill to learn, however, and can open you up to a wide variety of crafts and projects to complete.

Here is a guide on how to sew on a button, and hopefully you find it helpful!

First, you’ll need a button, fabric, and corresponding thread. For this example I’m using a sharply contrasting thread, but typically you’ll want one that matches your fabric and/or button.

Learning how to sew on a button is important for any beginner learning how to sew - Sew Me Your Stuff

We’ll start on the underside of the fabric, the opposite side from where the button will be. Starting from this side, stitch a small “X” on the front of the fabric to mark where the button will be. Your loose end of thread will be on the underside, but this “X” will be on the outside. If your button slides around during stitching, use this “X” to keep it in the right spot.

Learning how to sew on a button is important for any beginner learning how to sew - Sew Me Your Stuff

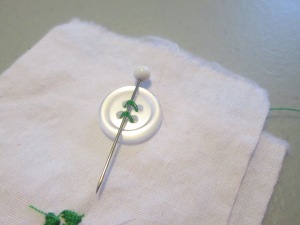
Place your button right on top of this “X” then place a pin, needle, toothpick, or similarly-shaped object on top of the button. This will keep you from sewing the button too tightly, which will be important later. This object is called the spacer.

Learning how to sew on a button is important for any beginner learning how to sew - Sew Me Your Stuff

Next, starting from the underside of the fabric, push your needle up through one of the holes of the button and down through another hole across your spacer.

Learning how to sew on a button is important for any beginner learning how to sew - Sew Me Your Stuff

Repeat this for the second set of holes if you’re using a 4-hole button like I am.

Learning how to sew on a button is important for any beginner learning how to sew - Sew Me Your Stuff

Now repeat the process multiple times for each set of holes. You can get creative and criss-cross holes if you’d like, but for simplicity’s sake I’m just going straight across. Three times per set of holes (6 total) should be sufficient.

Learning how to sew on a button is important for any beginner learning how to sew - Sew Me Your Stuff

Finally, from the underside of the fabric, push the needle up through the fabric but not through a hole. The thread should come out from under the button.

Learning how to sew on a button is important for any beginner learning how to sew - Sew Me Your Stuff

Now remove your spacer and lift your button away from the fabric. Thanks to your spacer, there will be some slack.

Learning how to sew on a button is important for any beginner learning how to sew - Sew Me Your Stuff

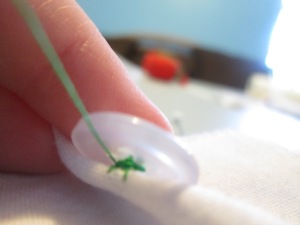
Now circle your thread around the slack below the button to form the shank. The shank gives the button some height so that it can sit on top of the fabric when pushed through the buttonhole. The thicker your fabric, the more times you should wrap the thread. For most fabrics, 6 times is enough.

Learning how to sew on a button is important for any beginner learning how to sew - Sew Me Your Stuff

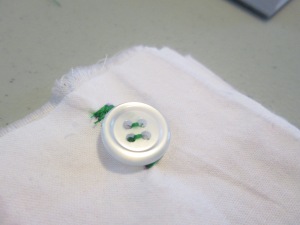
Now push your needle down through the fabric to tie off the thread. I do this by first pushing the needle through the stitches but don’t pull it all the way through to form a loop in the thread and use that to make the knot. Then take the loose end from the beginning of the process and tie a square knot.

Learning how to sew on a button is important for any beginner learning how to sew - Sew Me Your Stuff

Trim your ends and you’re done! Your button is ready for action.

Learning how to sew on a button is important for any beginner learning how to sew - Sew Me Your StuffLearning how to sew on a button is important for any beginner learning how to sew - Sew Me Your Stuff

Happy sewing!

Learni.st – Learn how to sew starting from step one
Pinterest & Twitter – Follow for tips, ideas, and more
Etsy – Shop Sew Me Your Stuff

Notions to Know: How to Sew a Zipper

Zippers are pretty much ubiquitous in our everyday lives – from clothing to accessories to home goods, we’ve all encountered a zipper at some point. But many people I’ve met who sew as a hobby and are great with many different sewing notions struggle with figuring out how to sew a zipper!

There are a few different techniques for attaching different kinds of zippers. but today we’re going to look at the most common and basic way to sew a zipper. It’s going to involve basting, covered in this post, and topstitching, mentioned in this post. You should also dig up your zipper foot if you’re sewing by machine. A zipper foot looks like this:


A zipper foot is essential in learning how to sew a zipper, a sewing notion - Sew Me Your Stuff

To demonstrate how to sew a zipper, I’ll mimic a zip-open back of a dress. Here are the materials I’ll be using:

  • Fabric of choice, cut into 2 equal rectangles
  • Zipper of desired length (Note: if you’re unsure about the length you need, it’s safer to buy a zipper that’s too long so that you can trim it later!)
  • Thread
  • Zipper foot

It's important to learn how to sew a zipper, a sewing notion - Sew Me Your Stuff

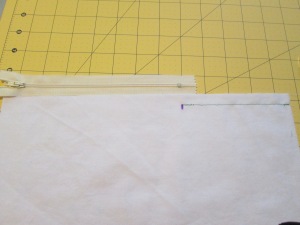
When you sew the back of a dress, before you attach the zipper you’re going to stitch the seam below where the zipper will be. Notice in this picture how I line up the zipper with the edge of my fabric to see where the bottom stop will be and then mark it.

It's important to learn how to sew a zipper, a sewing notion - Sew Me Your Stuff

Since my zipper is going to be 7 inches, I’m going to start the stitch 7 inches from the “top” of the fabric (minus the seam allowance) and stitch all the way to the “bottom.” Use your regular presser foot for this.

It's important to learn how to sew a zipper, a sewing notion - Sew Me Your Stuff

Next, press the seam open, including the unstitched seam allowances. (Review this post if you need to see how to press a seam!)

It's important to learn how to sew a zipper, a sewing notion - Sew Me Your Stuff

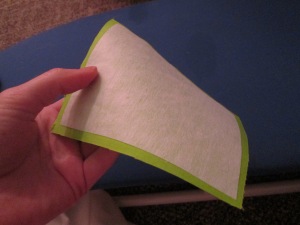
Now grab your zipper. Press the zipper tape flat, being careful not to touch the metal coils with the hot iron! Close the zipper and flip the pull tab upwards.

It's important to learn how to sew a zipper, a sewing notion - Sew Me Your Stuff

Position the zipper face down on the wrong side of the fabric, with the zipper teeth centered on the seam and the bottom stop where the stitched seam ends.

It's important to learn how to sew a zipper, a sewing notion - Sew Me Your Stuff

Baste one side of the zipper to the seam allowance, and place a pin right below the bottom stop.

It's important to learn how to sew a zipper, a sewing notion - Sew Me Your Stuff

Flip your fabric right side up, and position your zipper foot so that the foot is to the right of the needle. Set up your sewing machine to begin stitching at the pin, but remove the pin before you stitch.

It's important to learn how to sew a zipper, a sewing notion - Sew Me Your Stuff

Starting at the seam below the zipper, stitch across and up the length of the zipper on the right-hand side through all layers. I recommend starting the stitch with the zipper closed then opening the zipper once you’ve gotten about halfway down the zipper. You can’t sew around the zipper pull very easily, so you’ll want it out of the way.

It's important to learn how to sew a zipper, a sewing notion - Sew Me Your StuffIt's important to learn how to sew a zipper, a sewing notion - Sew Me Your Stuff

Now repeat on the left-hand side, moving your zipper foot so that it’s to the left of the needle.

It's important to learn how to sew a zipper, a sewing notion - Sew Me Your Stuff

Now just remove the basting. Congratulations – you now know how to sew a zipper!

It's important to learn how to sew a zipper, a sewing notion - Sew Me Your Stuff

This is just one method of attaching a zipper, but it’s the basic technique that can be adapted to many different situations.

Happy sewing!


Learni.st
 – Learn how to sew starting from step one
Pinterest & Twitter – Follow for tips, ideas, and more
Etsy – Shop Sew Me Your Stuff

Choosing the Right Interfacing for Your Project

When I first started to learn to sew with interfacing, I just looked for “fusible” and grabbed the first one I saw, thinking they were all basically the same aside form fusible/non-fusible differences. However, there are several (and I mean several) different types of interfacing for different projects and fabrics.

Now that you’ve learned how to attach fusible and non-fusible interfacing, how exactly do you choose the interfacing you need?

Choosing Interfacing Based on Fusibility:

So you know the basic differences between fusible interfacing and non-fusible interfacing, but you want to know when to use one over the other. As a general rule, fusible is better for beginners. Non-fusible (sew-in) interfacing can add bulk to a project that may be difficult for a beginner to handle. Attaching fusible interfacing is also a great way to practice your pressing! It uses less thread and is ( at least I think) a little less time-consuming.

However, sew-in interfacing looks more natural than fusible. Also, if your fabric cannot be pressed you obviously cannot attach a fusible interfacing to it. Here is a handy guide to fabrics that you generally should not hit with an iron or fusible interfacing.

Choosing Interfacing Based on Composition:

There are three basic classifications of interfacing based on composition: woven, non-woven, and knit. The differences are pretty easy to remember!

Knit interfacing is generally used for very stretchy knit fabrics, like jersey, because the interfacing can stretch with the fabric. Using a woven interfacing on a very stretchy fabric will inhibit its movement.

Woven interfacing should be used on very fine fabrics like silk. Woven interfacing has a grainline just like a woven fabric, so you have to cut the interfacing to match the grainline of your fabric, which helps the garment or craft stay true to its shape but can be a little challenging and takes up more of your material. Don’t use woven unless you absolutely need it!

Non-woven interfacing is a nice all-purpose interfacing for most projects, unless you’re using a very fine or very stretchy fabric. It does not have a grainline, so you can cut it in any direction, which makes it a more economical choice. As a beginner, this is what you should choose pretty much every time you have to buy interfacing.

Choosing Interfacing Based on Weight:

Finally, you have to consider the weight of your fabric and how it will be used when choosing interfacing. Aside from some specialty types of interfacing, interfacing is basically classified into a few groups based on weight:

  • Featherweight interfacing – Also called “sheer.” Use featherweight interfacing for very, very light fabrics.
  • Lightweight interfacing – The go-to for most garments.
  • Medium-weight interfacing – I would recommend medium-weight interfacing for crafts that you need to hold some shape but don’t want to be too stiff, like tote bags.
  • Heavyweight interfacing – This is best for most home decor, and when you need a project to hold a rigid shape.

In general, you should simply match the weight of your interfacing to the weight of your fabric. I’ve also heard that when in doubt between two types of interfacing, go with the lighter weight to play it safe. An interfacing that’s too heavy for your fabric will give it a strange appearance when finished.

If all of this seems a little overwhelming, don’t worry! You’ll get the hang of it soon. Plus, several fabric stores actually have an interfacing guide next to their rack of interfacing bolts to help you choose the right one for your project.

Happy sewing!
Learni.st – Learn how to sew starting from step one
Pinterest & Twitter – Follow for tips, ideas, and more
Etsy – Shop Sew Me Your Stuff

Sewing with Elastic: Elastic Casing

Hello sewists! Sorry for the hold up in posts – lent my camera to a friend for the weekend and just got it back. But now it’s time to get back to business by learning to use a new notion in your projects: sewing with elastic.

Sewing with elastic is a great skill to learn, and learning how to sew with elastic can be the first step in moving from beginner projects to more personalized crafts and garments. As mentioned in this earlier post, there are two ways to add elastic to your project. You can either insert it into a casing or sew it directly to your fabric.

In this post, we’ll cover the easier of the two: sewing an elastic casing.

I’m going to demonstrate by making a small bag with an elastic opening.

A bag with an elastic casing is an easy craft for a beginner learning how to sew elastic, a sewing notion - Sew Me Your Stuff

The first thing I did was to measure out a rectangular shape – about 14″ x 6 1/2″. That way my bag would be roughly 6″ x 6″ when completed. I only cut one piece of fabric to fold in half to use as the bag, but you can also cut two identical pieces to stitch together. The folded version is just easier!

A bag with an elastic casing is an easy craft for a beginner learning how to sew elastic, a sewing notion - Sew Me Your Stuff

Here is my cut out piece of fabric that will become a small bag! Next it’s time to fold it in half as I mentioned before.

A bag with an elastic casing is an easy craft for a beginner learning how to sew elastic, a sewing notion - Sew Me Your StuffA bag with an elastic casing is an easy craft for a beginner learning how to sew elastic, a sewing notion - Sew Me Your Stuff

If you’re using a fabric with a right side and a wrong side, fold right sides together. The fabric I’m using does not have a district wrong side, so it’s a little hard to tell in these pictures. But when you do this fold, the wrong side should be on the outside.

A bag with an elastic casing is an easy craft for a beginner learning how to sew elastic, a sewing notion - Sew Me Your Stuff

Press the fold in place so that all raw edges are even, including the sides and the opening. The fold will be the bottom of the bag. Next we will stitch the side seams.

A bag with an elastic casing is an easy craft for a beginner learning how to sew elastic, a sewing notion - Sew Me Your Stuff

The side seams are the raw edges perpendicular to the fold. Stitch, press, and trim the sides.

Now it’s time to look at your elastic. What is the width? Mine for this project is 1/2 inch. The width of your casing should be about 1/4 inch wider than your elastic band, so I’m going to do a casing that is 3/4 inches.

A bag with an elastic casing is an easy craft for a beginner learning how to sew elastic, a sewing notion - Sew Me Your StuffA bag with an elastic casing is an easy craft for a beginner learning how to sew elastic, a sewing notion - Sew Me Your Stuff

At the opening of your bag with wrong side out, measure the width of your elastic casing and press it down all around the bag.

A bag with an elastic casing is an easy craft for a beginner learning how to sew elastic, a sewing notion - Sew Me Your Stuff

Here is the pressed elastic casing. Remember, at this point your bag should be wrong side out.

A bag with an elastic casing is an easy craft for a beginner learning how to sew elastic, a sewing notion - Sew Me Your Stuff

Place two marks along the edge of your casing, approximately 2 inches apart. This will be the opening where you insert your elastic.

A bag with an elastic casing is an easy craft for a beginner learning how to sew elastic, a sewing notion - Sew Me Your StuffA bag with an elastic casing is an easy craft for a beginner learning how to sew elastic, a sewing notion - Sew Me Your Stuff

Next, stitch your casing shut starting at one mark all the way around to the second mark, but leaving the 2 inch opening unstitched.

A bag with an elastic casing is an easy craft for a beginner learning how to sew elastic, a sewing notion - Sew Me Your Stuff

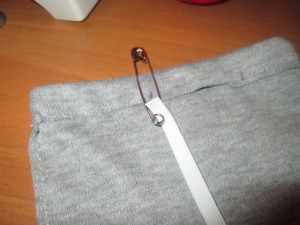
Attach a safety pin to one end of your elastic. Don’t attach it right to the end because it might get pulled off!

A bag with an elastic casing is an easy craft for a beginner learning how to sew elastic, a sewing notion - Sew Me Your StuffA bag with an elastic casing is an easy craft for a beginner learning how to sew elastic, a sewing notion - Sew Me Your Stuff

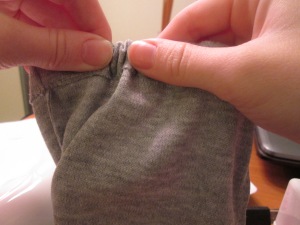
Push the elastic through the casing safety pin first, moving the fabric over the safety pin. Make sure your elastic does not get twisted in this process! When your safety pin has made it all the way around the bag, overlap the ends of your elastic. I’m making my elastic band a little shorter than the circumference of the bag so that the casing will have some bunch to it when finished.

A bag with an elastic casing is an easy craft for a beginner learning how to sew elastic, a sewing notion - Sew Me Your StuffA bag with an elastic casing is an easy craft for a beginner learning how to sew elastic, a sewing notion - Sew Me Your Stuff

Stitch the ends of your elastic together multiple times, backstitching several times. Trim the excess ends and push the elastic band fully into the casing.

A bag with an elastic casing is an easy craft for a beginner learning how to sew elastic, a sewing notion - Sew Me Your Stuff

Sew the 2 inch opening shut, with your elastic band fully enclosed in the casing.

A bag with an elastic casing is an easy craft for a beginner learning how to sew elastic, a sewing notion - Sew Me Your Stuff

And voila! You now have a bag with an elastic opening! This skill will come in handy for many projects, more than just simple bags!

Happy sewing!

Learni.st – Learn how to sew starting from step one
Pinterest & Twitter – Follow for tips, ideas, and more
Etsy – Shop Sew Me Your Stuff

How to Attach Non-Fusible Interfacing

Hello sewists! I’ve covered the usefulness of interfacing in this post, and earlier I shared a post about how to attach fusible interfacing, which you can view here.

However, not all interfacing is fusible. Some forms of interfacing are non-fusible and cannot be attached just using steam and heat.

Fusible interfacing is a really great tool for giving shape to your projects and doesn’t require being stitched onto fabric. Non-fusible interfacing is sometimes called “sew-in” interfacing because it doesn’t have an adhesive side like fusible interfacing does and has to be attached by being sewn to the fabric.

The process of attaching non-fusible interfacing differs a little bit from attaching fusible interfacing, so here’s a guide to using non-fusible interfacing to give a project some shape.

First, you’ll want to cut out your pattern pieces. I’m demonstrating on a Christmas stocking, and I’m attaching interfacing to the lining so that it holds the stocking shape.

Learning the difference between fusible and non-fusible interfacing and how to attach each is important for a beginner learning to sew with sewing notions - Sew Me Your Stuff

Notice that I cut out the interfacing to be the exact same size as the fabric piece. When cutting out fusible interfacing you also cut it to be the same size at first. However, non-fusible is different in that you don’t trim the edges before attaching.

Learning the difference between fusible and non-fusible interfacing and how to attach each is important for a beginner learning to sew with sewing notions - Sew Me Your Stuff

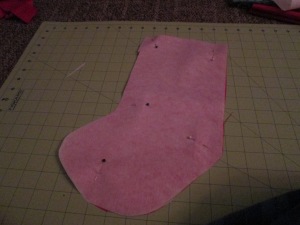
Pin the interfacing to the fabric, matching the raw edges.

Tip: Notice that my pins are not right along the raw edge like you normally do when pinning together two pieces of fabric. I also used as few pins as possible. This is because the interfacing is very thick and can get distorted easily with the pins. I removed the pins as I stitched to keep the edges as even as possible.

Before you stitch, you should have decided how wide your seam allowance will be. When you stitch the interfacing onto the fabric, you’ll want to use a slightly shorter seam allowance so that the interfacing will definitely be stitched into your seam.

For example, I typically use a 1/2 inch seam allowance. So for this piece of fabric, I’ll be using a 3/8 inch seam allowance when attaching my interfacing.

Learning the difference between fusible and non-fusible interfacing and how to attach each is important for a beginner learning to sew with sewing notions - Sew Me Your Stuff

Stitch the interfacing onto the fabric as a normal straight stitch.

Learning the difference between fusible and non-fusible interfacing and how to attach each is important for a beginner learning to sew with sewing notions - Sew Me Your Stuff

After you stitch the interfacing onto the fabric, trim the interfacing very close to the stitch to reduce bulk in your seams. This is why you have to use a shorter seam allowance rather than one that is the same length that you normally use. After you trim your interfacing, you can still be sure that it will be in your line of stitching and give your fabric a smooth look.

Learning the difference between fusible and non-fusible interfacing and how to attach each is important for a beginner learning to sew with sewing notions - Sew Me Your StuffLearning the difference between fusible and non-fusible interfacing and how to attach each is important for a beginner learning to sew with sewing notions - Sew Me Your Stuff

Now your interfacing is attached directly to the fabric. Remember that non-fusible interfacing is different from fusible in that when attaching fusible, you trim the edges before you attach. As you can see with the non-fusible interfacing, you trim  after you attach.

Next I repeated this process on the matching piece of fabric and stitched the two together to form the lining of the stocking. When I stitch the seam, notice that the seam stitch is slightly deeper than the stitch used to attach the interfacing.

Learning the difference between fusible and non-fusible interfacing and how to attach each is important for a beginner learning to sew with sewing notions - Sew Me Your Stuff

The stitch closer to the raw edge is the stitch used to attach the interfacing, and the deeper stitch is the seam.

All in all, non-fusible interfacing is no more difficult to attach than fusible. I tend to prefer fusible because you don’t have to use as much thread and it sticks directly to the fabric. When stitching my non-fusible interfacing, I had trouble with the fabric and interfacing becoming separated and throwing off my stitches which isn’t a problem I have with fusible.

Remember to use the interfacing guide at your fabric store if possible to pick the right interfacing for your project!

Learni.st – Learn how to sew starting from step one
Pinterest & Twitter – Follow for tips, ideas, and more
Etsy – Shop Sew Me Your Stuff

September/October 2012 Summary

Hello sewists! It’s November, which means it’s time to put the shorts away and stay warm inside while you get started on some Christmas crafts! If you’ve fallen behind on Sew Me Your Stuff posts, here’s a recap of what’s been covered the last couple of months.

Need to go back further? Past recaps:

Sewing Patterns:

Sewing Machine Help:

Notions and other Tools:

A Bag’s Life:

Remember, if you ever would like to see a topic covered by Sew Me Your Stuff, just submit it here!

Learni.st – Learn how to sew starting from step one
Pinterest & Twitter – Follow for tips, ideas, and more
Etsy – Shop Sew Me Your Stuff

How to Attach Fusible Interfacing

It’s time to take a little break from the sewing machine and talk about fusible interfacing. It is a very handy tool that is really worth your time to learn how to use properly!

I first mentioned fusible interfacing in this post about important notions and tools you’ll need to know as you expand into new crafts and projects.

Interfacing is used to stiffen fabric so that your finished project will hold a certain shape. It’s usually used in collars and buttonholes but has many applications. Interfacing can be fusible or nonfusible. Fusible interfacing can be attached to fabric using heat, but nonfusible must be stitched to the fabric.

This post will help you learn to apply fusible interfacing using your iron. Remember, you can click any of the pictures to enlarge for clarity.

Things you’ll need:

  • The piece of fabric on which you need to apply the interfacing
  • A piece of fusible interfacing cut slightly smaller than your piece of fabric, typically about 1/4 inch from the cut edge
  • Your iron on a medium/high setting
  • A pressing cloth
  • Some water, in a spray bottle if possible

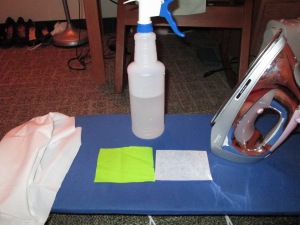
Having the right equipment is important when learning how to attach fusible interfacing if you are a beginner learning to sew with sewing notions - Sew Me Your Stuff

Here I have set up everything that I need. I’m only attaching a small piece of fusible interfacing to fabric. Notice that the interfacing piece is slightly smaller than my fabric piece. When you trace a sewing pattern, generally you will trace the same size interfacing pieces as fabric pieces. However, before you attach the fusible interfacing, you’ll want to trim it to be about 1/4 inch from the edge of the fabric to avoid bulk.

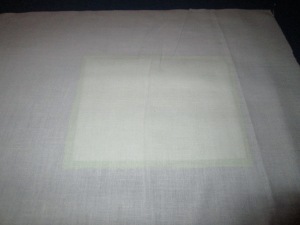
Having the right equipment is important when learning how to attach fusible interfacing if you are a beginner learning to sew with sewing notions - Sew Me Your Stuff

Place your interfacing right side down on the wrong side of your fabric. In other words, place the fabric on your ironing board wrong side up. Then place your interfacing on top of the fabric right side down. The right side of the interfacing is the sticky side with raised bumps. The wrong side, which is smoother and not sticky, should be face up.

Then place your pressing cloth on top of both pieces. Your pressing cloth should be a thin piece of cotton fabric.

Attaching fusible interfacing properly is important for a beginner learning to sew with sewing notions - Sew Me Your Stuff

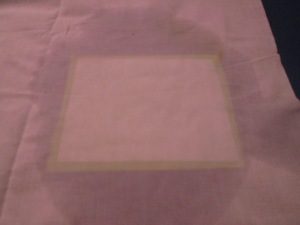
Next, spray the pressing cloth with water until it is damp. Dampen the entire area covering the fabric and the interfacing. If you do not have a spray bottle, you can wet your cloth in the sink, but a spray bottle will save you time. You don’t want your fabric to be soaking wet, and a spray bottle will help you aim right for the area that will be over the interfacing and fabric.

Attaching fusible interfacing properly is important for a beginner learning to sew with sewing notions - Sew Me Your Stuff

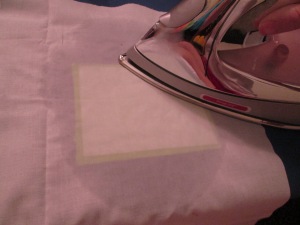
While you set up your fabric, interfacing, and pressing cloth, you should allow your iron to heat to a medium/high setting. Once your cloth is properly damp, press your iron firmly onto a section of the fabric and interfacing for 10-15 seconds.

Attaching fusible interfacing properly is important for a beginner learning to sew with sewing notions - Sew Me Your Stuff

Now there’s an iron-shaped dry spot right exactly I was pressing my iron!  If you have your cloth at optimal dampness and your iron at optimal heat, the pressing cloth should be dry when you lift your iron. Repeat this until you have pressed your iron onto every section of the fabric and interfacing.

Attaching fusible interfacing properly is important for a beginner learning to sew with sewing notions - Sew Me Your Stuff

And voila! Now the interfacing sticks directly to the fabric even as I bend it, fold it, and wave it around.

There are varying weights of interfacing to choose from based on the weight of your fabric and your desired stiffness. When you go to the fabric store, they may have a guide handy next to their interfacing bolts to help you choose the right weight for your project.

Happy sewing!

Learni.st – Learn how to sew starting from step one
Pinterest & Twitter – Follow for tips, ideas, and more
Etsy – Shop Sew Me Your Stuff

Notions to Know

There are a lot of crafts and garments that can be made with just some properly cut fabric and stitches, but to expand your repertoire you’re going to need to learn about notions. Notions are basically any non-fabric part of a garment or tool used to create a certain effect.

In this post and this post about buying your beginning sewing supplies, as well as in this video, you’ll find a lot of basic tools and notions that will help you construct a basic craft or garment. Now that you’ve moved onto sewing patterns and are getting a little more advanced, you’ll encounter patterns that call for specific notions to create specific effects. Here are a few that I ran into a lot as a beginner that left me confused or intimidated.

  • Buttons
    Buttons are a basic but important sewing notion for beginners who are learning to sew - Sew Me Your Stuff
    We all know buttons. But actually attaching them to a garment takes a bit of effort – you might want to look for a sewing machine with a buttonhole stitch to make these easier. Some machines even have a stitch to sew on buttons, but personally I usually sew notions like this by hand to gain more precision. There will definitely be a post or two in the future about sewing buttons!
  • Zippers
    Zippers are important basic sewing notions for beginners learning to sew. - Sew Me Your StuffZippers are important basic sewing notions for beginners learning to sew. - Sew Me Your Stuff
    Zippers are a bit of a challenge to learn – even my mother never bothered to sew things with zippers because she never got the hang of it. Really encouraging for me to hear when she was helping me learn to sew. But with some practice and careful reading of the instructions, you can pick it up in no time. Invisible zippers are handy to learn, but sometimes you just need a basic zipper.  Once you learn the process of attaching a zipper, you’ll be opened up to a whole new world of crafts you can make!
  • Elastic
    Elastic is an important basic sewing notion for beginners learning to sew. - Sew Me Your Stuff
    Elastic is generally used to fit a garment or create an effect and can be attached in different ways. You can sew a casing, push the elastic through, and sew it shut. Also you can sew the elastic directly to the fabric, which I find more challenging because sewing on a stretch is never easy for beginners. However, casings are pretty easy and can give beginners a lot of opportunities to get creative with projects!
  • Interfacing
    Interfacing is an important sewing notion for beginners learning to sew to learn. - Sew Me Your Stuff
    Okay, this may not count as a “notion,” technically. If your pattern calls for interfacing, it’s usually listed under the fabric requirements. It’s bought by the yard just as fabric as well. Most patterns I’ve seen will call for fusible interfacing, which is attached to fabric using an iron. Non-fusible interfacing is sewn on. Interfacing is used to stiffen fabric and keep it from warping, such as collars or buttonholes. Once you use it a couple of times it’s no sweat at all!
  • Bias tape
    Bias tape is a sewing notion with a lot of great uses for a beginner learning to sew  - Sew Me Your Stuff
    Bias tape has many wonderful and handy uses, but full disclosure I haven’t really used it for any of them. You can finish raw edges with it, add accents, bind seams, and a lot more. It’s fabric that’s been cut on the bias of fabric so it won’t unravel and has much more flexibility than fabric that follows the grainline. Basically there are a million things you can use bias tape for, and I’m going to make a million tutorials to help you learn them!

Happy sewing!

Learni.st – Learn how to sew starting from step one
Pinterest & Twitter – Follow for tips, ideas, and more
Etsy – Shop Sew Me Your Stuff

July 2012 Summary

If you’ve just recently started reading the Sew Me Your Stuff blog, you might have missed some earlier posts that have really useful information for any beginner who’s just learning to sew. Since it’s the end of the month, here’s a look back at this month’s posts so you can jump to any that you might have missed and want to read.
Stitches:

Fabrics:

Tools and Supplies:

Next month I’ll start tutorial videos and project guides once I finally get home from China. Thanks for reading, and I’m looking forward to a very crafty August with you!

Learni.st – Learn how to sew starting from step one
Pinterest & Twitter – Follow for tips, ideas, and more
Etsy – Shop Sew Me Your Stuff