Notions to Know: How to Sew on a Button by Hand

Buttons are an extremely common item that we’ve all encountered. And if you’re like me when I started sewing, you probably have a basic understanding of how a button is attached to fabric but aren’t sure exactly how to sew on a button for yourself. It is a very handy skill to learn, however, and can open you up to a wide variety of crafts and projects to complete.

Here is a guide on how to sew on a button, and hopefully you find it helpful!

First, you’ll need a button, fabric, and corresponding thread. For this example I’m using a sharply contrasting thread, but typically you’ll want one that matches your fabric and/or button.

Learning how to sew on a button is important for any beginner learning how to sew - Sew Me Your Stuff

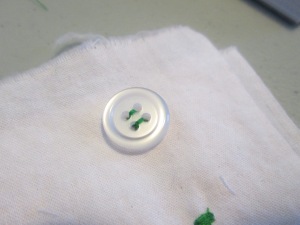
We’ll start on the underside of the fabric, the opposite side from where the button will be. Starting from this side, stitch a small “X” on the front of the fabric to mark where the button will be. Your loose end of thread will be on the underside, but this “X” will be on the outside. If your button slides around during stitching, use this “X” to keep it in the right spot.

Learning how to sew on a button is important for any beginner learning how to sew - Sew Me Your Stuff

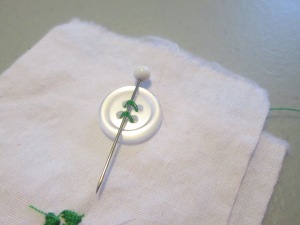
Place your button right on top of this “X” then place a pin, needle, toothpick, or similarly-shaped object on top of the button. This will keep you from sewing the button too tightly, which will be important later. This object is called the spacer.

Learning how to sew on a button is important for any beginner learning how to sew - Sew Me Your Stuff

Next, starting from the underside of the fabric, push your needle up through one of the holes of the button and down through another hole across your spacer.

Learning how to sew on a button is important for any beginner learning how to sew - Sew Me Your Stuff

Repeat this for the second set of holes if you’re using a 4-hole button like I am.

Learning how to sew on a button is important for any beginner learning how to sew - Sew Me Your Stuff

Now repeat the process multiple times for each set of holes. You can get creative and criss-cross holes if you’d like, but for simplicity’s sake I’m just going straight across. Three times per set of holes (6 total) should be sufficient.

Learning how to sew on a button is important for any beginner learning how to sew - Sew Me Your Stuff

Finally, from the underside of the fabric, push the needle up through the fabric but not through a hole. The thread should come out from under the button.

Learning how to sew on a button is important for any beginner learning how to sew - Sew Me Your Stuff

Now remove your spacer and lift your button away from the fabric. Thanks to your spacer, there will be some slack.

Learning how to sew on a button is important for any beginner learning how to sew - Sew Me Your Stuff

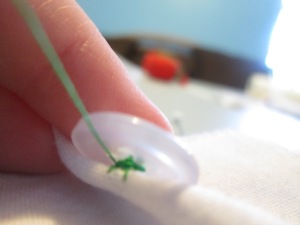
Now circle your thread around the slack below the button to form the shank. The shank gives the button some height so that it can sit on top of the fabric when pushed through the buttonhole. The thicker your fabric, the more times you should wrap the thread. For most fabrics, 6 times is enough.

Learning how to sew on a button is important for any beginner learning how to sew - Sew Me Your Stuff

Now push your needle down through the fabric to tie off the thread. I do this by first pushing the needle through the stitches but don’t pull it all the way through to form a loop in the thread and use that to make the knot. Then take the loose end from the beginning of the process and tie a square knot.

Learning how to sew on a button is important for any beginner learning how to sew - Sew Me Your Stuff

Trim your ends and you’re done! Your button is ready for action.

Learning how to sew on a button is important for any beginner learning how to sew - Sew Me Your StuffLearning how to sew on a button is important for any beginner learning how to sew - Sew Me Your Stuff

Happy sewing!

Learni.st – Learn how to sew starting from step one
Pinterest & Twitter – Follow for tips, ideas, and more
Etsy – Shop Sew Me Your Stuff

How to Baste When Sewing By Hand

Typically when you want to attach two pieces of fabric together to stitch either by hand or machine, you use pins to attach them to each other. This is useful in most cases, but there are times when you want to use a technique known as basting.

Basting is simply a very long, easily removed placeholder stitch. Don’t secure the ends when using a basting stitch, because they will be removed at the end of your project. You can use it in a lot of situations when pins may add too much bulk or not completely hold the pieces together, for example:

  • Attaching certain notions like zippers and bias tape
  • When trying a technique for the first time, to make sure you’re piecing your fabric together correctly
  • When fabric is likely to shift
  • When using a lot of layers of fabric, which pins may cause to bubble or pile up

For a basic demonstration of hand basting, check out this short video:

Now let me show you some of the ways you can use basting on a project by making a zipper pouch.

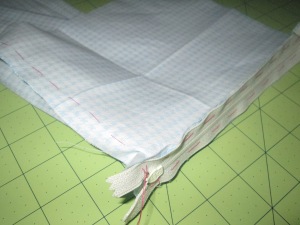
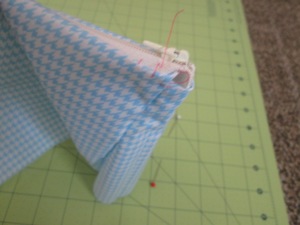
First, I used basting on one of the sides and the zipper to make sure I was putting it together correctly.

Sewing basting stitches comes in handy for a beginner learning how to sew - Sew Me Your Stuff
Here are the basting stitches when the bag is inside out.

Sewing basting stitches comes in handy for a beginner learning how to sew - Sew Me Your Stuff

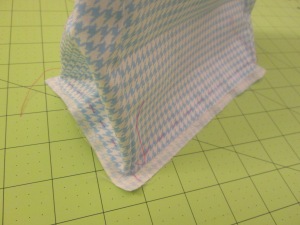
Here are the same stitches from the outside. When you sew basting, the stitches will most likely be a little loose as you can see in this picture, so be sure to leave long ends so that they don’t get pulled out of place!

I then used basting to keep the zipper in place before I stitched it.

Sewing basting stitches comes in handy for a beginner learning how to sew - Sew Me Your Stuff

I left the basting in as I stitched, and that held the zipper and fabric together more evenly than pins typically do.

Sewing basting stitches comes in handy for a beginner learning how to sew - Sew Me Your Stuff

After this I removed the basting and repeated on the other side.

Then I used basting to attach the bottom of the bag because I was going to stitch the seam from the outside and use bias tape around the edges.

Sewing basting stitches comes in handy for a beginner learning how to sew - Sew Me Your Stuff

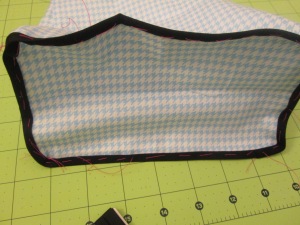
Next after cutting the edges to be even, I hand basted the bias tape onto the edges to keep that in place for stitching too.

Sewing basting stitches comes in handy for a beginner learning how to sew - Sew Me Your Stuff

After this I just stitched the bias tape and it was done!

Sewing basting stitches comes in handy for a beginner learning how to sew - Sew Me Your Stuff

Here’s the bag after removing some of the basting. Note: Usually you use a thread that matches the bias tape, but I used materials that sharply contrasted on purpose for this demonstration!

Now some basic tips to make your basting easier:

  • Use a contrasting thread with your fabric so that you remember to remove it at the end!
  • Try to baste near your seamline rather than near the raw edge to mimic the real thing as closely as possible
  • Save your basting thread once you remove it so that you can reuse it later
  • Like I mentioned before, leave long ends free so that you don’t accidentally pull it through the fabric and lose the stitch
  • Find a way to store your excess thread by color. I use plastic bags and the thread does get tangled occasionally, but storing it by color makes it much easier to get what I need rather than going through a big knot of different colored threads.

Sewing basting stitches comes in handy for a beginner learning how to sew - Sew Me Your Stuff

Here are a couple of my basting bags!

Now go forth and baste away, opening doors to all kinds of sewing opportunities.

Happy sewing!
Learni.st – Learn how to sew starting from step one
Pinterest & Twitter – Follow for tips, ideas, and more
Etsy – Shop Sew Me Your Stuff

Machine Sewing vs. Hand Sewing – Should You Make the Switch?

By now you have the basic hand stitches down pat and have put them to use making crafts and gifts. So here comes the big question: Should you look into sewing on a machine?

Some people believe there is no way you can achieve the same results sewing by hand that you can by machine, but remember people wore clothes for hundreds or thousands of years before sewing machines were invented. Marie Antoinette didn’t have a sewing machine!

Marie Antoinette's dresses were all sewn by hand, which should be encouraging to a beginner learning to sew - Sew Me Your StuffMarie Antoinette's dresses were all sewn by hand, which should be encouraging to anyone learning to sew. - Sew Me Your Stuff
All done by hand!

So there are pros and cons to switching to machine that you should consider before you dive in.

Pros:
– Stitches tend to be more secure. Sewing machines use two strands of thread simultaneously as you stitch, so if done properly stitches should be stronger and more resistant to being pulled apart.
– It’s faster. A lot faster. A hand stitched pillow could take an hour to two hours by hand but would take 20 minutes by machine. Now imagine sewing a dress and how much time you would save using a machine!
– I think using a machine for thicker fabrics like twill is much easier than doing it by hand. You have to make some adjustments on the machine to accommodate different fabrics, but in general they can maneuver different types of fabrics, particularly thicker ones, more easily than you can by hand.

Cons:
– It can be pretty expensive if you want quality. There are inexpensive “starter” sewing machines on the market that will run about $100 or less, but a good quality standard sewing machine for the home will run you about $200. It’s important to do a lot of research before you make the purchase so you don’t have buyer’s remorse later on!
– There are a lot of knobs and dials to learn, so there is a learning curve on using a sewing machine. I’ve been at it for over a year and sometimes I still resort to trial and error twisting knobs on the machine when I’m not happy with the way my stitches look. Before you start you should do some reading to familiarize yourself with all the different functions of your machine.
– Sewing machines unfortunately can’t do everything. Notions are much easier to sew by hand, and hems are usually attached with a hand stitch. I even sew darts in garments by hand now because it got too frustrating with a machine.

My verdict is that if you’re wanting to try to sew on the machine, go for it. But do the research and keep your hand sewing skills sharp because you’ll still need them! A good balance of machine stitches and hand stitches is the best way to make your crafts and garments hold strong and look great.

Learni.st – Learn how to sew starting from step one
Pinterest & Twitter – Follow for tips, ideas, and more
Etsy – Shop Sew Me Your Stuff

How to Sew a Straight Stitch by Hand – YouTube

Disclaimer: Not my video! Borrowed from YouTube user cyberseams. Once I get back to the States in August I’ll start sharing original videos.

The stitch in this video may seem incredibly easy, but it’s a great one to learn first to get acquainted with sewing and handling a needle.

First get some scrap fabric and fold it into two layers.

Thread your needle either by using a threader or simply by pushing the end of the thread through the eye (not as hard as it may sound!)

To keep the thread in place, I simply make a very small stitch at the beginning and tie the loose end and the needle end of the thread into a square knot.

Follow the technique in the video.

At the end of the stitch, watch this video for a technique for tying off the end of the thread.

And voila, you have sewn two pieces of fabric together!

Learni.st – Learn how to sew starting from step one
Pinterest & Twitter – Follow for tips, ideas, and more
Etsy – Shop Sew Me Your Stuff