Notions to Know: How to Sew on a Button by Hand

Buttons are an extremely common item that we’ve all encountered. And if you’re like me when I started sewing, you probably have a basic understanding of how a button is attached to fabric but aren’t sure exactly how to sew on a button for yourself. It is a very handy skill to learn, however, and can open you up to a wide variety of crafts and projects to complete.

Here is a guide on how to sew on a button, and hopefully you find it helpful!

First, you’ll need a button, fabric, and corresponding thread. For this example I’m using a sharply contrasting thread, but typically you’ll want one that matches your fabric and/or button.

Learning how to sew on a button is important for any beginner learning how to sew - Sew Me Your Stuff

We’ll start on the underside of the fabric, the opposite side from where the button will be. Starting from this side, stitch a small “X” on the front of the fabric to mark where the button will be. Your loose end of thread will be on the underside, but this “X” will be on the outside. If your button slides around during stitching, use this “X” to keep it in the right spot.

Learning how to sew on a button is important for any beginner learning how to sew - Sew Me Your Stuff

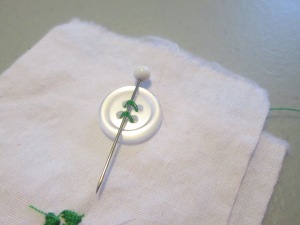
Place your button right on top of this “X” then place a pin, needle, toothpick, or similarly-shaped object on top of the button. This will keep you from sewing the button too tightly, which will be important later. This object is called the spacer.

Learning how to sew on a button is important for any beginner learning how to sew - Sew Me Your Stuff

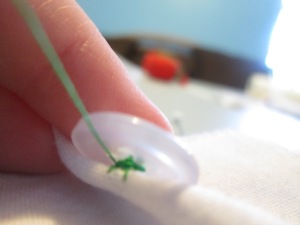
Next, starting from the underside of the fabric, push your needle up through one of the holes of the button and down through another hole across your spacer.

Learning how to sew on a button is important for any beginner learning how to sew - Sew Me Your Stuff

Repeat this for the second set of holes if you’re using a 4-hole button like I am.

Learning how to sew on a button is important for any beginner learning how to sew - Sew Me Your Stuff

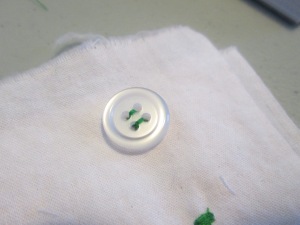
Now repeat the process multiple times for each set of holes. You can get creative and criss-cross holes if you’d like, but for simplicity’s sake I’m just going straight across. Three times per set of holes (6 total) should be sufficient.

Learning how to sew on a button is important for any beginner learning how to sew - Sew Me Your Stuff

Finally, from the underside of the fabric, push the needle up through the fabric but not through a hole. The thread should come out from under the button.

Learning how to sew on a button is important for any beginner learning how to sew - Sew Me Your Stuff

Now remove your spacer and lift your button away from the fabric. Thanks to your spacer, there will be some slack.

Learning how to sew on a button is important for any beginner learning how to sew - Sew Me Your Stuff

Now circle your thread around the slack below the button to form the shank. The shank gives the button some height so that it can sit on top of the fabric when pushed through the buttonhole. The thicker your fabric, the more times you should wrap the thread. For most fabrics, 6 times is enough.

Learning how to sew on a button is important for any beginner learning how to sew - Sew Me Your Stuff

Now push your needle down through the fabric to tie off the thread. I do this by first pushing the needle through the stitches but don’t pull it all the way through to form a loop in the thread and use that to make the knot. Then take the loose end from the beginning of the process and tie a square knot.

Learning how to sew on a button is important for any beginner learning how to sew - Sew Me Your Stuff

Trim your ends and you’re done! Your button is ready for action.

Learning how to sew on a button is important for any beginner learning how to sew - Sew Me Your StuffLearning how to sew on a button is important for any beginner learning how to sew - Sew Me Your Stuff

Happy sewing!

Learni.st – Learn how to sew starting from step one
Pinterest & Twitter – Follow for tips, ideas, and more
Etsy – Shop Sew Me Your Stuff

A Bag’s Life Part 3: The Construction

And now the epic conclusion to the Sew Me Your Stuff saga of how to go from pattern to product – Market Tote Edition.  This post detailed the process of choosing an easy pattern for a beginner and finding notions in the store. This post will guide you through understanding the pattern and setting it up to get started. Now it’s time to learn how to turn that pattern into a finished craft!

The last step mentioned in the previous post was cutting out the pattern pieces needed for your project. The next step will be to trace the pieces onto fabric, but there’s a little preparation before you do that.

Learning how to use a sewing pattern to make a craft is important for beginners learning to sew - Sew Me Your Stuff

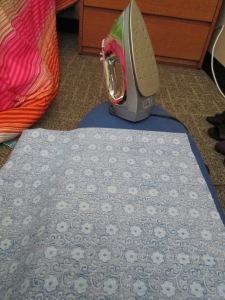
First, you’ll need to iron the fabric to smooth out any wrinkles. Wrinkles can distort the traced pattern and cause your final product to be pretty wonky. This fabric that I’m using I picked from the home decor section of the fabric store, and it’s a simple woven cotton. I highly recommend a fabric like this for a beginner’s craft. It was great to work with!

Learning how to use a sewing pattern to make a craft is important for beginners learning to sew - Sew Me Your Stuff

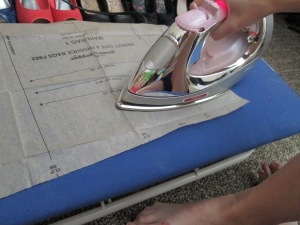
Next you have to flip your iron to a low setting and press your pattern pieces flat. The folds and creases in the paper can also distort your lines, so it’s very important that you completely flatten the pattern piece.

Learning how to use a sewing pattern to make a craft is important for beginners learning to sew - Sew Me Your Stuff

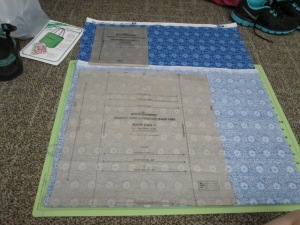
Before you begin tracing, lay the pattern pieces on the fabric to be sure that you’re leaving yourself enough fabric for both pieces. The pattern instructions will often contain a guide to laying the pieces that you can use to help you with this step.

Learning how to use a sewing pattern to make a craft is important for beginners learning to sew - Sew Me Your Stuff

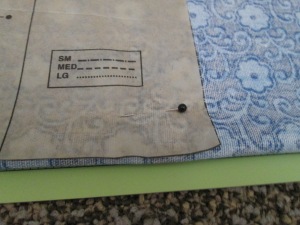
To help you trace the pattern accurately, you should pin the pattern to the fabric. If your fabric is folded, pin the pattern through all layers. This thin paper can easily be shifted while tracing, but pins will hold it in place.

Learning how to use a sewing pattern to make a craft is important for beginners learning to sew - Sew Me Your Stuff

Next it’s time to actually trace the pattern. Because all of the edges are straight, I used a ruler to guide me. This isn’t always possible, but if you can then it will help you keep your lines accurate.

Learning how to use a sewing pattern to make a craft is important for beginners learning to sew - Sew Me Your Stuff

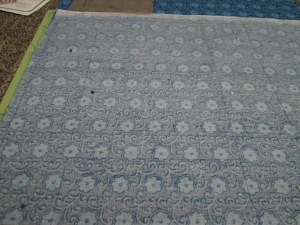
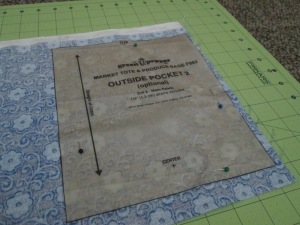
You can see in this picture that I completely traced the outline of the pattern, but very importantly I also traced the markings on the pattern that indicate where the pocket and straps should go. Make sure you transfer all markings from the pattern to the fabric!

Learning how to use a sewing pattern to make a craft is important for beginners learning to sew - Sew Me Your Stuff

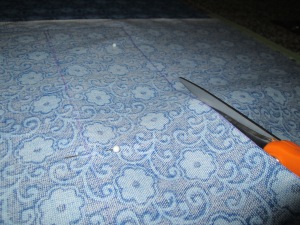
Next it’s time to cut! With all the extra markings on the fabric, be sure you only cut the lines that you’re supposed to.

Learning how to use a sewing pattern to make a craft is important for beginners learning to sew - Sew Me Your Stuff

Repeat this process for all pattern pieces. It may be most time-effective to trace all pieces and then cut all pieces, but because of the layout of these pieces I decided to do them separately.

Learning how to use a sewing pattern to make a craft is important for beginners learning to sew - Sew Me Your Stuff

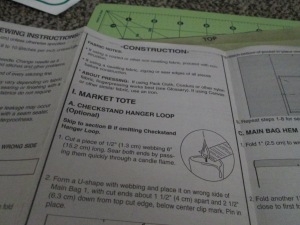
From here on out I’ll be following the instructions included in the sewing pattern. It’s very important that you start with the first step and follow the instructions carefully. (I actually skipped the checkstand hanger loop)

Learning how to use a sewing pattern to make a craft is important for beginners learning to sew - Sew Me Your Stuff

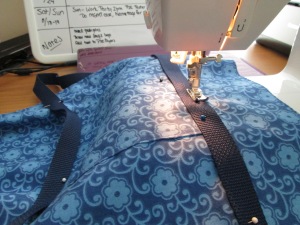
Midway through the process. Webbing straps are pretty easy to sew! Notice that all pins are perpendicular to the path of the sewing machine. Most sewing machines can tolerate horizontal pins like this, but if your pins are vertical it can damage your sewing machine!

Learning how to use a sewing pattern to make a craft is important for beginners learning to sew - Sew Me Your Stuff

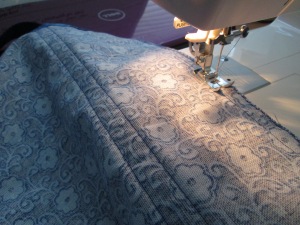
Sewing the side seams. I had some crookedness in my stitches, but this fabric was very easy to move through the machine.

Learning how to use a sewing pattern to make a craft is important for beginners learning to sew - Sew Me Your Stuff

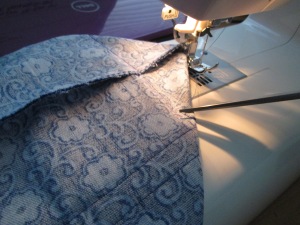
Cutting the last stitch!

Learning how to use a sewing pattern to make a craft is important for beginners learning to sew - Sew Me Your Stuff

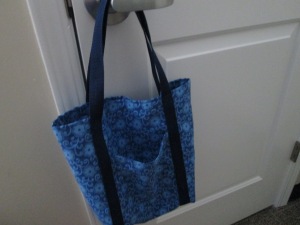
And voila! We have a bag!

Hopefully this series has helped you see how easy it is to go from cutting the pattern to putting your new tote bag (or other craft) to work. You can really surprise yourself with what you’re capable of making once you get the hang of sewing!

Learni.st – Learn how to sew starting from step one
Pinterest & Twitter – Follow for tips, ideas, and more
Etsy – Shop Sew Me Your Stuff

How to Set Up your Sewing Machine

I remember when I first got my mother’s sewing machine out of the closet it was already threaded and ready to go. I was toying away with it when I accidentally pulled the thread out of place and tried to re-thread it but could not figure out how to do it and had to give up until she could dig up the instructions manual. Sometimes the actual process of sewing by machine may not seem so intimidating, but how do you actually get the machine going?

Here is a guide on how to get your machine ready to sew.

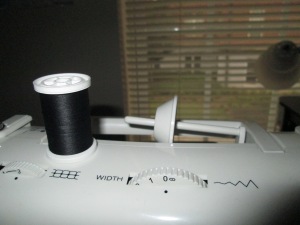
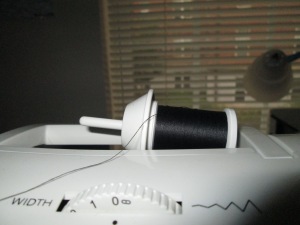
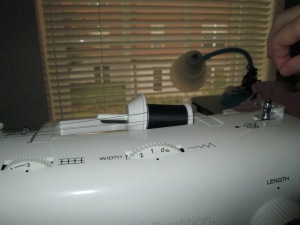
First, you’ll want to get your thread spool placed on your machine. Note: Not every machine is exactly alike, so take these as general guidelines because your machine may have some slight differences. The basic idea is the same!

The first step for a beginner who's learning to sew is to put the thread on the sewing machine - Sew Me Your StuffThe first step for a beginner who's learning to sew is to put the thread on the sewing machine - Sew Me Your Stuff

The first picture is a free standing spool of thread, with the spool pin behind it. In the second picture, the spool has been placed on the spool pin and secured, with one end of the thread free to sew.

Next, it’s time to wind your bobbin.

Winding the bobbin properly is important for a beginner learning to sew on a sewing machine - Sew Me Your Stuff

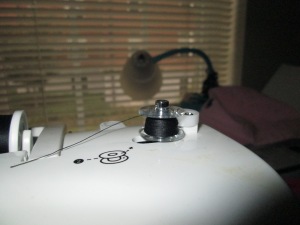
To wind the bobbin, thread the proper guides and tension discs as your machine requires. My machine is illustrated to show you how to properly place the thread. After you have done this, insert one end of the thread upwards through a hole in the bobbin top (Click the picture to enlarge for clarity). Place the bobbin on the spindle until it clicks in place and if needed, slide the spindle to the side until it clicks. Hold onto the end of the thread as pictured and press your pedal.

Your machine will typically automatically stop winding the bobbin when it fills with thread. At this point you can cut the thread that attaches it to the spool.

A properly wound bobbin is important for an beginner learning to sew with a sewing machine - Sew Me Your Stuff

I didn’t fully wind this bobbin, but you can see the remnant of the thread that was stuck through the top of the bobbin and the loose end that was just cut.

Next, into the machine it goes!

Placing your bobbin properly in the case is important for any beginner learning to sew on a sewing machine. - Sew Me Your Stuff

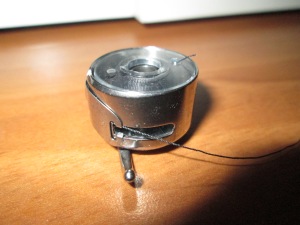
While inserting the bobbin into the case, hold the loose end of the thread in your fingers and pull it through the gap in the case until it resembles the picture. If you pull the end, thread should come out of the bobbin without a lot of resistance.

Next, insert the bobbin and case into the machine.

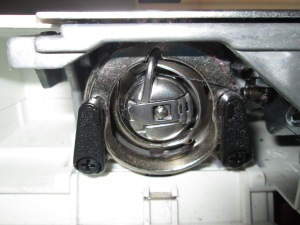
Inserting the bobbin and bobbin case properly into the sewing machine is important for any beginner learning to sew on a sewing machine - Sew Me Your Stuff

Do this by lifting the latch on the top of the case while pushing the case into the machine until it clicks into place.

Next it’s time to put your needle in place!

Inserting a sewing machine needle properly is important for any beginner learning to sew on a sewing machine - Sew Me Your StuffInserting a sewing machine needle properly is important for any beginner learning to sew on a sewing machine - Sew Me Your Stuff

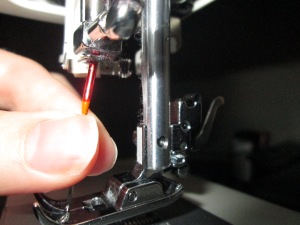
In the first picture, I am sliding the needle upwards into place. In the second, I am securing it by twisting the knob (lefty loosey, righty tighty, of course).

We’re almost done! Next it’s time to thread the needle with the top thread.

Threading your top thread on your sewing machine properly is important for any beginner learning to sew on a sewing machine. - Sew Me Your Stuff

Follow your machine’s specific instructions, but on machines like mine you’ll find a numbered guide to help you thread the machine properly.

When you reach the needle, push it on through.

Threading your sewing machine needle properly is important for any beginner learning to sew on a sewing machine - Sew Me Your Stuff

Some machines have fancy gadgets to thread the needle for you, but I just physically push the end of the thread through the eye.

Now you need to retrieve your bobbin thread.

Setting up your sewing machine properly is important for any beginner learning to sew on a sewing machine - Sew Me Your Stuff

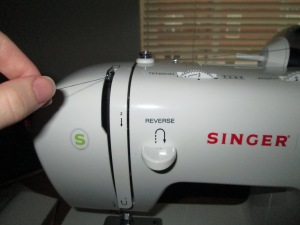
Hold the end of the thread upwards and to the side.

Setting up your sewing machine properly is important for any beginner learning to sew on a sewing machineSetting up your sewing machine properly is important for any beginner learning to sew on a sewing machine - Sew Me Your Stuff

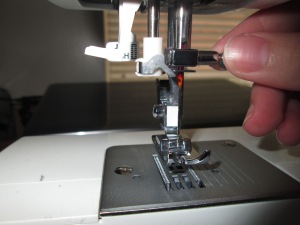
Using the handwheel, not the pedal, slowly rotate so that the needle goes downward and back up through one stitch motion, holding on to the top thread with your hand the whole time.

Setting up your sewing machine properly is important for any beginner learning to sew on a sewing machine - Sew Me Your Stuff

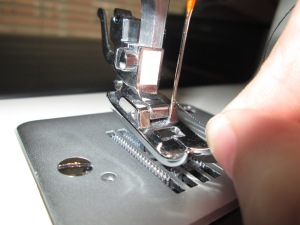
A loop of thread will appear out of the bottom of the machine. Voila, this is the bobbin thread!

Setting up your sewing machine properly is important for any beginner learning to sew on a sewing machine - Sew Me Your Stuff

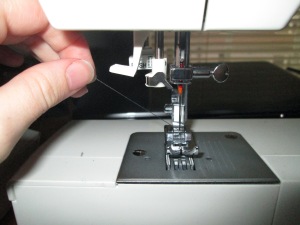
Pull upwards on the top thread that you’re holding until the loop comes loose and the end of the bobbin thread is out.

Setting up your sewing machine properly is important for any beginner learning to sew on a sewing machine - Sew Me Your Stuff

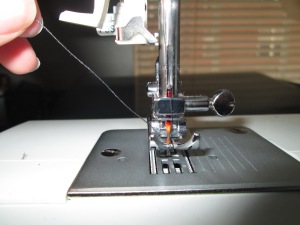
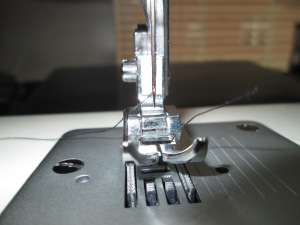
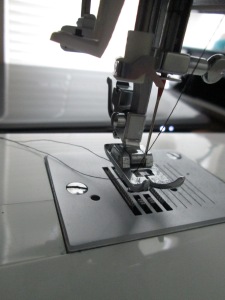
Push the two ends of thread under the presser foot and backwards, and you’re ready to roll!

It may seem like a very long process, but once you get the hang of it it’ll be a snap! Happy sewing!

Learni.st – Learn how to sew starting from step one
Pinterest & Twitter – Follow for tips, ideas, and more
Etsy – Shop Sew Me Your Stuff

A Bag’s Life Part 1: The Fabric Store

Earlier I shared a post helping you choose your first sewing pattern, which you can find here. Now it’s time to put it into action by demonstrating how to use a sewing pattern to create a bag!

I started by going to my local fabric store and heading to the patterns section, looking for the beginner section. The store provides books full of patterns that you choose from filing cabinets, but beginners get a special section with sewing patterns on display.

Learning how to use a sewing pattern to make a craft is important for beginners learning to sew - Sew Me Your Stuff
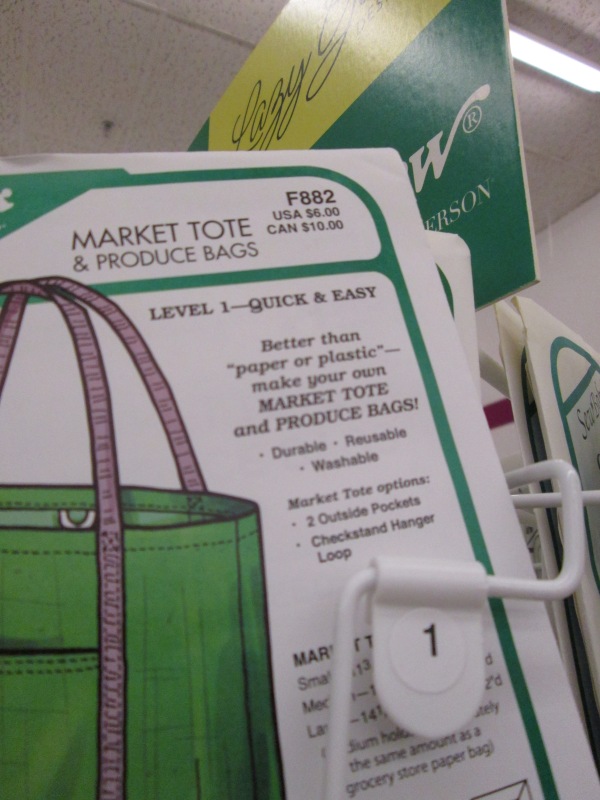
I chose a pattern for a bag that was marked “Level 1” for beginner sewists. You can also look for Simplicity beginner patterns or patterns with a label saying “Yes it’s easy!” or something similar. Next I turned it over to check out the notions and fabric requirements.

Learning how to use a sewing pattern to make a craft is important for beginners learning to sew - Sew Me Your Stuff
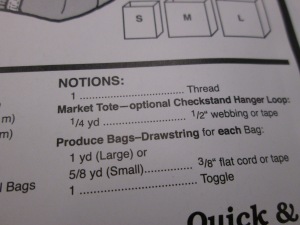
I’m choosing to do the Market Tote, so I ignored the requirement for the Produce Bag and the optional checkstand loop. Other than that, it seems the only notion I need is thread – perfect!

Learning how to use a sewing pattern to make a craft is important for beginners learning to sew - Sew Me Your Stuff
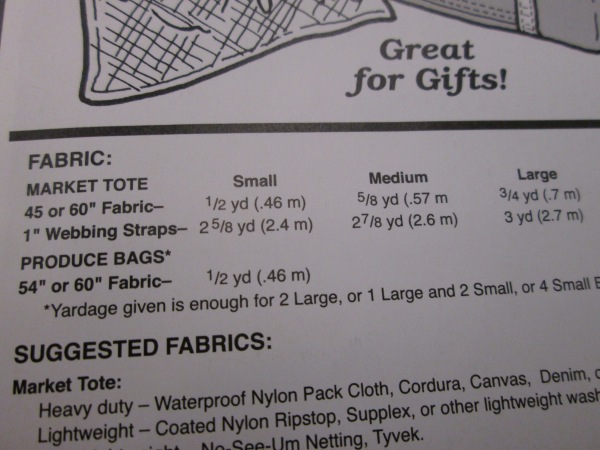
This pattern calls for less than a yard of fabric, so it’s possible I could peruse the remnant rack for an appropriate fabric. It also calls for webbing straps, which can be found in the ribbon section of the store.

Learning how to use a sewing pattern to make a craft is important for beginners learning to sew - Sew Me Your Stuff
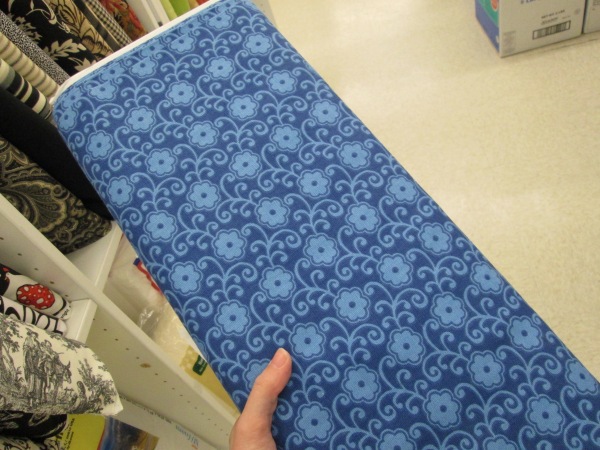
I saw this woven cotton fabric and really wanted to use it, so I forewent the remnant rack and got a cut of this. I decided to do the Medium bag, so I cut 5/8 of a yard.

Learning how to use a sewing pattern to make a craft is important for beginners learning to sew - Sew Me Your Stuff
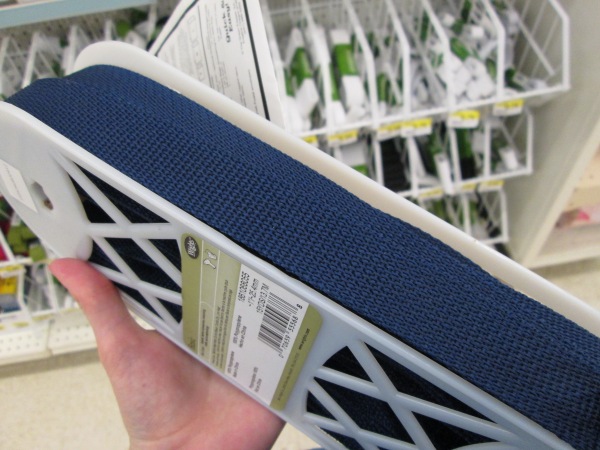
This is a roll of webbing strap (or something close enough to it!) that’s cut by the yard. I actually got a little extra of this because there were 15 inches left after my 2 7/8 yard cut. If you agree to buy that extra portion, the store usually gives it to you at a discount.

I already have dark blue thread, but at this point you should make sure you have a matching thread for your fabric. Nothing worse than getting home all excited about a new craft only to realize you forgot to buy thread!

And that’s all it takes to get started! I walked out of the store with everything I need to make a new bag, and I can’t wait to get started and share the process with you! Next I’ll be demonstrating how to use the sewing pattern to create a bag.

Learni.st – Learn how to sew starting from step one
Pinterest & Twitter – Follow for tips, ideas, and more
Etsy – Shop Sew Me Your Stuff

The Pressing Issue

Hello sewists! I apologize if it seems there’s been a lack of activity on Sew Me Your Stuff. My dino laptop decided to no longer connect to the internet, so I’ve been using a public computer to update my blog and Learnist when I can. But this is a pretty important post for beginners as you learn to sew so I wanted to be sure I shared it with you!

When you buy your first sewing patterns, you may find that the pattern instructs you to press the craft or garment in certain ways during the construction process. Also, it is necessary during all sewing projects to press your seams as you go to give the product a more professional-looking finish.

So what is pressing exactly?

Well, on the surface, it may look a lot like ironing. But there are a few key differences!

1. Unlike ironing, you don’t typically move the iron back and forth across the fabric in swift motions. When pressing, you use the tip of the iron to manipulate fabric, and you use repeated pressure rather than wide sweeps.
2. The goal of ironing is to remove wrinkles, which is why you use the back and forth motions to force the fabric flat. When pressing, your goal is to set a piece of fabric into a particular position, such as pressing up a hem or pressing open a seam. Sweeping back and forth would distort the grain of the fabric when doing this, so you only press the specific point you’re working on with the tip of the iron.

So what is pressing used for?

Typically, you’ll use pressing after sewing a seam. Stitch the seam, then separate the seam allowances to press it flat until it seems to become one with the rest of the fabric. At this point, it’s a good idea to finish the raw edges as well, but make sure the seams lie flat. Sometimes your pattern instructions will tell you to press the seam in a particular direction, but otherwise assume it’s to be pressed flat.

Also, pressing is used when tucking a raw edge in towards the craft or garment, like when you’re completing a hem. In these situations, your pattern will often call for you to press the edge up (or down) once or more and them stitch it in place.

So how do you press?

You may want to find a pressing cloth before you start. A pressing cloth can be anything as long as it’s 100% cotton. Most often recommended are old bed sheets and T-shirts. It’s helpful if you have something transparent so that you can still see what you’re pressing.

Once you have your pressing cloth, place your fabric in position according to the directions and the pressing cloth on top. Then press the tip of the iron to set the fabric into position inch by inch.

One thing I’ve learned from styling hair (random, I know) is that you get your best results if you hold the fabric in place with your fingertips after you lift the iron until the fabric cools. This will keep the new fold or seam in place better than pressing it over and over without holding it.

If you need a demonstration, here’s a short video where I demonstrate how to press a simple seam open and flat.

When you press your seams, you’ll probably want to repeat the motion more than I do in this video. This is just a quick demonstration of the technique.

Right now in the beginner stage, pressing seams flat is probably the best choice as you learn to sew from patterns and more complicated projects. As you become more advanced, you’ll find many ways to finish your edges and give your hand-made projects a more professional look and feel.

Learni.st – Learn how to sew starting from step one
Pinterest & Twitter – Follow for tips, ideas, and more
Etsy – Shop Sew Me Your Stuff

Happy sewing!

Video: How to Sew a Sunglasses Case

Hello sewists!

Looking for an easy project that you can do with just scraps of fabric? Look no further!

Apologies for the lack of sound. I lost my voice while filming this so I just cut out the sound to spare you all.

Here’s what you’ll need:

  • A 6″x6″ square of any fabric of your choice
  • A 6″x6″ square of felt or fleece if you would like your case to be cushioned. If not, fabric of your choice.
  • Fabric marking tool (I recommend chalk for this so you won’t have to wash it)
  • Needle & thread
  • Scissors

And that’s it!

This is a great easy project that you can really get creative with. Have fun and happy sewing!

Learni.st – Learn how to sew starting from step one
Pinterest & Twitter – Follow for tips, ideas, and more
Etsy – Shop Sew Me Your Stuff
Video: How to Sew a Blanket Stitch Heart

Hello everyone! I’m back home in the USA and that means sewing videos! For my first video I just wanted to demonstrate a really simple craft you can do to get used to hand sewing and fabric marking and cutting:

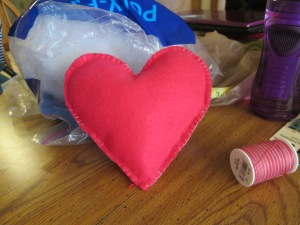
A blanket stitch heart is a very simple craft for someone who's learning to sew
A blanket stitch heart!

Here’s a video demonstrating how I made this. The ending got cut off awkwardly but hopefully you can still follow what I’m doing.

The materials I used are:

  • Felt fabric – cut by the yard then cut into a square
  • Embroidery thread, double threaded
  • Embroidery needle
  • Tailor’s chalk
  • Pins
  • Scissors
  • Polyester pillow filling

I only had to buy the fabric, filling, needles, and thread for this specific project and it cost me under $15. I have plenty of material left over to make many more!

And that is the first original Sew Me Your Stuff video! Thanks so much for watching. Let me know if you try this and how it turns out! You can do any shape in any color so I think this is a great craft for beginners. It was actually my first time doing a shaped pillow so I had some mistakes along the way, but I’ll definitely be exploring this more.
Have a great week!

Learni.st – Learn how to sew starting from step one
Pinterest & Twitter – Follow for tips, ideas, and more
Etsy – Shop Sew Me Your Stuff