Typically when you want to attach two pieces of fabric together to stitch either by hand or machine, you use pins to attach them to each other. This is useful in most cases, but there are times when you want to use a technique known as basting.
Basting is simply a very long, easily removed placeholder stitch. Don’t secure the ends when using a basting stitch, because they will be removed at the end of your project. You can use it in a lot of situations when pins may add too much bulk or not completely hold the pieces together, for example:
- Attaching certain notions like zippers and bias tape
- When trying a technique for the first time, to make sure you’re piecing your fabric together correctly
- When fabric is likely to shift
- When using a lot of layers of fabric, which pins may cause to bubble or pile up
For a basic demonstration of hand basting, check out this short video:
Now let me show you some of the ways you can use basting on a project by making a zipper pouch.
First, I used basting on one of the sides and the zipper to make sure I was putting it together correctly.
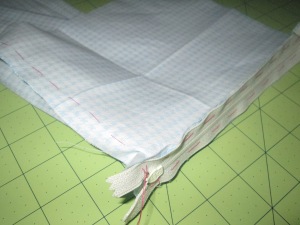
Here are the basting stitches when the bag is inside out.
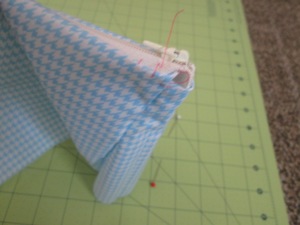
Here are the same stitches from the outside. When you sew basting, the stitches will most likely be a little loose as you can see in this picture, so be sure to leave long ends so that they don’t get pulled out of place!
I then used basting to keep the zipper in place before I stitched it.

I left the basting in as I stitched, and that held the zipper and fabric together more evenly than pins typically do.

After this I removed the basting and repeated on the other side.
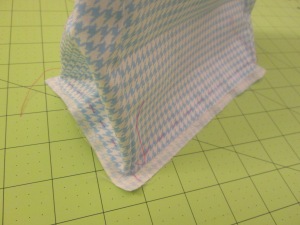
Then I used basting to attach the bottom of the bag because I was going to stitch the seam from the outside and use bias tape around the edges.
Next after cutting the edges to be even, I hand basted the bias tape onto the edges to keep that in place for stitching too.
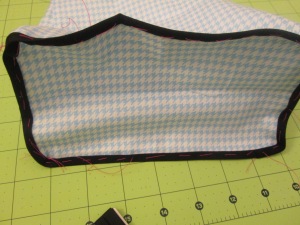
After this I just stitched the bias tape and it was done!

Here’s the bag after removing some of the basting. Note: Usually you use a thread that matches the bias tape, but I used materials that sharply contrasted on purpose for this demonstration!
Now some basic tips to make your basting easier:
- Use a contrasting thread with your fabric so that you remember to remove it at the end!
- Try to baste near your seamline rather than near the raw edge to mimic the real thing as closely as possible
- Save your basting thread once you remove it so that you can reuse it later
- Like I mentioned before, leave long ends free so that you don’t accidentally pull it through the fabric and lose the stitch
- Find a way to store your excess thread by color. I use plastic bags and the thread does get tangled occasionally, but storing it by color makes it much easier to get what I need rather than going through a big knot of different colored threads.

Here are a couple of my basting bags!
Now go forth and baste away, opening doors to all kinds of sewing opportunities.
Happy sewing!
Learni.st – Learn how to sew starting from step one
Pinterest & Twitter – Follow for tips, ideas, and more
Etsy – Shop Sew Me Your Stuff


