Notions to Know: How to Sew a Buttonhole

In this post, I covered how to sew on a button by hand. But we all know a button is not very useful without a hole for it! So how do you sew a buttonhole?

Many sewing machines come equipped with a buttonhole stitch and foot. If your machine has this function, sewing a buttonhole is as easy as a little set up and pushing the pedal according to your machine’s instructions. If not, there’s still hope for you!

This post will teach you how to sew a buttonhole using a simple zigzag stitch.

First, mark your fabric where the buttonhole will go. The length of the hole should be just slightly longer than the width of the button. I’m using a 5/8″ button, so my hole will be just longer than 5/8″. When you do this on a real craft, you’ll want to use something easily washable like tailor’s chalk, because buttonholes usually show on the finished product. For this demonstration I’m just using a fabric marker.

Working with sewing notions is important for a beginner learning how to sew a buttonhole - Sew Me Your Stuff

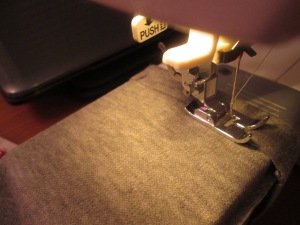
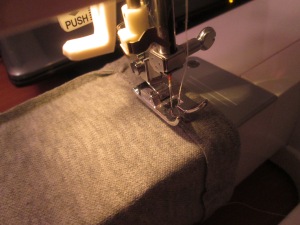
Next, set up your fabric in your machine with the regular presser foot. It’s wise to use interfacing before you sew a buttonhole to stabilize the fabric, but for this demonstration I’m just using two layers of cotton fabric. Start with the top of the hole below the needle.

Working with sewing notions is important for a beginner learning how to sew a buttonhole - Sew Me Your Stuff

Set your machine to a wide zigzag stitch, with a stitch length of 0. Sew a few stitches and then stop.

Working with sewing notions is important for a beginner learning how to sew a buttonhole - Sew Me Your Stuff

Adjust your fabric so that the needle is just to the right of the mark. Set your machine to a narrower zigzag stitch with a short stitch length (but longer than 0) and sew the length of the mark.

Working with sewing notions is important for a beginner learning how to sew a buttonhole - Sew Me Your Stuff

When you reach the bottom, repeat the wide zigzag stitch used at the top.

Working with sewing notions is important for a beginner learning how to sew a buttonhole - Sew Me Your StuffWorking with sewing notions is important for a beginner learning how to sew a buttonhole - Sew Me Your Stuff

Now position your fabric so that the needle is to the left of the mark. Stitch in reverse with a narrow zigzag stitch and a short stitch length.

Working with sewing notions is important for a beginner learning how to sew a buttonhole - Sew Me Your Stuff

Now cut your thread and pull the fabric out of the machine. Using a seam ripper and/or small scissors, cut the fabric on the mark. Be careful not to cut the stitches!

Working with sewing notions is important for a beginner learning how to sew a buttonhole - Sew Me Your StuffWorking with sewing notions is important for a beginner learning how to sew a buttonhole - Sew Me Your Stuff

Now your buttonhole is ready to go!

Working with sewing notions is important for a beginner learning how to sew a buttonhole - Sew Me Your Stuff

Happy sewing!

Learni.st – Learn how to sew starting from step one
Pinterest & Twitter – Follow for tips, ideas, and more
Etsy – Shop Sew Me Your Stuff

Notions to Know: How to Sew on a Button by Hand

Buttons are an extremely common item that we’ve all encountered. And if you’re like me when I started sewing, you probably have a basic understanding of how a button is attached to fabric but aren’t sure exactly how to sew on a button for yourself. It is a very handy skill to learn, however, and can open you up to a wide variety of crafts and projects to complete.

Here is a guide on how to sew on a button, and hopefully you find it helpful!

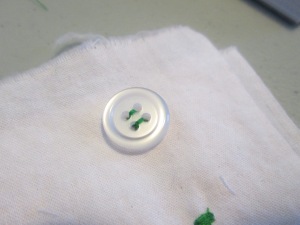
First, you’ll need a button, fabric, and corresponding thread. For this example I’m using a sharply contrasting thread, but typically you’ll want one that matches your fabric and/or button.

Learning how to sew on a button is important for any beginner learning how to sew - Sew Me Your Stuff

We’ll start on the underside of the fabric, the opposite side from where the button will be. Starting from this side, stitch a small “X” on the front of the fabric to mark where the button will be. Your loose end of thread will be on the underside, but this “X” will be on the outside. If your button slides around during stitching, use this “X” to keep it in the right spot.

Learning how to sew on a button is important for any beginner learning how to sew - Sew Me Your Stuff

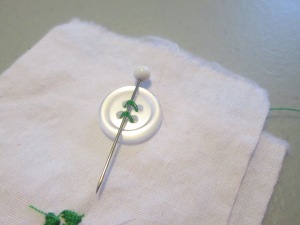
Place your button right on top of this “X” then place a pin, needle, toothpick, or similarly-shaped object on top of the button. This will keep you from sewing the button too tightly, which will be important later. This object is called the spacer.

Learning how to sew on a button is important for any beginner learning how to sew - Sew Me Your Stuff

Next, starting from the underside of the fabric, push your needle up through one of the holes of the button and down through another hole across your spacer.

Learning how to sew on a button is important for any beginner learning how to sew - Sew Me Your Stuff

Repeat this for the second set of holes if you’re using a 4-hole button like I am.

Learning how to sew on a button is important for any beginner learning how to sew - Sew Me Your Stuff

Now repeat the process multiple times for each set of holes. You can get creative and criss-cross holes if you’d like, but for simplicity’s sake I’m just going straight across. Three times per set of holes (6 total) should be sufficient.

Learning how to sew on a button is important for any beginner learning how to sew - Sew Me Your Stuff

Finally, from the underside of the fabric, push the needle up through the fabric but not through a hole. The thread should come out from under the button.

Learning how to sew on a button is important for any beginner learning how to sew - Sew Me Your Stuff

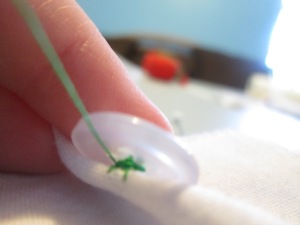
Now remove your spacer and lift your button away from the fabric. Thanks to your spacer, there will be some slack.

Learning how to sew on a button is important for any beginner learning how to sew - Sew Me Your Stuff

Now circle your thread around the slack below the button to form the shank. The shank gives the button some height so that it can sit on top of the fabric when pushed through the buttonhole. The thicker your fabric, the more times you should wrap the thread. For most fabrics, 6 times is enough.

Learning how to sew on a button is important for any beginner learning how to sew - Sew Me Your Stuff

Now push your needle down through the fabric to tie off the thread. I do this by first pushing the needle through the stitches but don’t pull it all the way through to form a loop in the thread and use that to make the knot. Then take the loose end from the beginning of the process and tie a square knot.

Learning how to sew on a button is important for any beginner learning how to sew - Sew Me Your Stuff

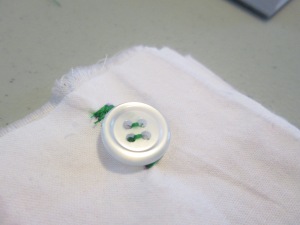
Trim your ends and you’re done! Your button is ready for action.

Learning how to sew on a button is important for any beginner learning how to sew - Sew Me Your StuffLearning how to sew on a button is important for any beginner learning how to sew - Sew Me Your Stuff

Happy sewing!

Learni.st – Learn how to sew starting from step one
Pinterest & Twitter – Follow for tips, ideas, and more
Etsy – Shop Sew Me Your Stuff

Notions to Know: How to Sew a Zipper

Zippers are pretty much ubiquitous in our everyday lives – from clothing to accessories to home goods, we’ve all encountered a zipper at some point. But many people I’ve met who sew as a hobby and are great with many different sewing notions struggle with figuring out how to sew a zipper!

There are a few different techniques for attaching different kinds of zippers. but today we’re going to look at the most common and basic way to sew a zipper. It’s going to involve basting, covered in this post, and topstitching, mentioned in this post. You should also dig up your zipper foot if you’re sewing by machine. A zipper foot looks like this:


A zipper foot is essential in learning how to sew a zipper, a sewing notion - Sew Me Your Stuff

To demonstrate how to sew a zipper, I’ll mimic a zip-open back of a dress. Here are the materials I’ll be using:

  • Fabric of choice, cut into 2 equal rectangles
  • Zipper of desired length (Note: if you’re unsure about the length you need, it’s safer to buy a zipper that’s too long so that you can trim it later!)
  • Thread
  • Zipper foot

It's important to learn how to sew a zipper, a sewing notion - Sew Me Your Stuff

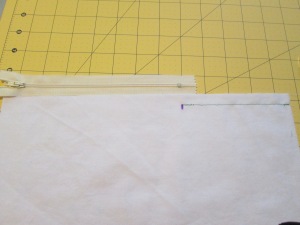
When you sew the back of a dress, before you attach the zipper you’re going to stitch the seam below where the zipper will be. Notice in this picture how I line up the zipper with the edge of my fabric to see where the bottom stop will be and then mark it.

It's important to learn how to sew a zipper, a sewing notion - Sew Me Your Stuff

Since my zipper is going to be 7 inches, I’m going to start the stitch 7 inches from the “top” of the fabric (minus the seam allowance) and stitch all the way to the “bottom.” Use your regular presser foot for this.

It's important to learn how to sew a zipper, a sewing notion - Sew Me Your Stuff

Next, press the seam open, including the unstitched seam allowances. (Review this post if you need to see how to press a seam!)

It's important to learn how to sew a zipper, a sewing notion - Sew Me Your Stuff

Now grab your zipper. Press the zipper tape flat, being careful not to touch the metal coils with the hot iron! Close the zipper and flip the pull tab upwards.

It's important to learn how to sew a zipper, a sewing notion - Sew Me Your Stuff

Position the zipper face down on the wrong side of the fabric, with the zipper teeth centered on the seam and the bottom stop where the stitched seam ends.

It's important to learn how to sew a zipper, a sewing notion - Sew Me Your Stuff

Baste one side of the zipper to the seam allowance, and place a pin right below the bottom stop.

It's important to learn how to sew a zipper, a sewing notion - Sew Me Your Stuff

Flip your fabric right side up, and position your zipper foot so that the foot is to the right of the needle. Set up your sewing machine to begin stitching at the pin, but remove the pin before you stitch.

It's important to learn how to sew a zipper, a sewing notion - Sew Me Your Stuff

Starting at the seam below the zipper, stitch across and up the length of the zipper on the right-hand side through all layers. I recommend starting the stitch with the zipper closed then opening the zipper once you’ve gotten about halfway down the zipper. You can’t sew around the zipper pull very easily, so you’ll want it out of the way.

It's important to learn how to sew a zipper, a sewing notion - Sew Me Your StuffIt's important to learn how to sew a zipper, a sewing notion - Sew Me Your Stuff

Now repeat on the left-hand side, moving your zipper foot so that it’s to the left of the needle.

It's important to learn how to sew a zipper, a sewing notion - Sew Me Your Stuff

Now just remove the basting. Congratulations – you now know how to sew a zipper!

It's important to learn how to sew a zipper, a sewing notion - Sew Me Your Stuff

This is just one method of attaching a zipper, but it’s the basic technique that can be adapted to many different situations.

Happy sewing!


Learni.st
 – Learn how to sew starting from step one
Pinterest & Twitter – Follow for tips, ideas, and more
Etsy – Shop Sew Me Your Stuff

How to Baste When Sewing By Hand

Typically when you want to attach two pieces of fabric together to stitch either by hand or machine, you use pins to attach them to each other. This is useful in most cases, but there are times when you want to use a technique known as basting.

Basting is simply a very long, easily removed placeholder stitch. Don’t secure the ends when using a basting stitch, because they will be removed at the end of your project. You can use it in a lot of situations when pins may add too much bulk or not completely hold the pieces together, for example:

  • Attaching certain notions like zippers and bias tape
  • When trying a technique for the first time, to make sure you’re piecing your fabric together correctly
  • When fabric is likely to shift
  • When using a lot of layers of fabric, which pins may cause to bubble or pile up

For a basic demonstration of hand basting, check out this short video:

Now let me show you some of the ways you can use basting on a project by making a zipper pouch.

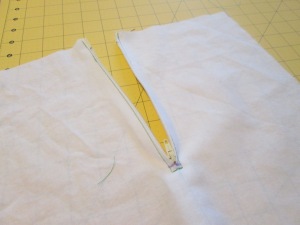
First, I used basting on one of the sides and the zipper to make sure I was putting it together correctly.

Sewing basting stitches comes in handy for a beginner learning how to sew - Sew Me Your Stuff
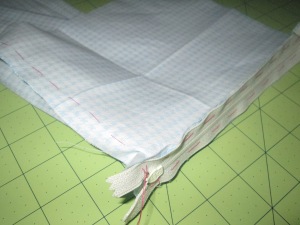
Here are the basting stitches when the bag is inside out.

Sewing basting stitches comes in handy for a beginner learning how to sew - Sew Me Your Stuff

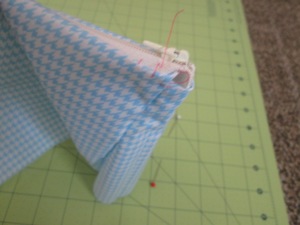
Here are the same stitches from the outside. When you sew basting, the stitches will most likely be a little loose as you can see in this picture, so be sure to leave long ends so that they don’t get pulled out of place!

I then used basting to keep the zipper in place before I stitched it.

Sewing basting stitches comes in handy for a beginner learning how to sew - Sew Me Your Stuff

I left the basting in as I stitched, and that held the zipper and fabric together more evenly than pins typically do.

Sewing basting stitches comes in handy for a beginner learning how to sew - Sew Me Your Stuff

After this I removed the basting and repeated on the other side.

Then I used basting to attach the bottom of the bag because I was going to stitch the seam from the outside and use bias tape around the edges.

Sewing basting stitches comes in handy for a beginner learning how to sew - Sew Me Your Stuff

Next after cutting the edges to be even, I hand basted the bias tape onto the edges to keep that in place for stitching too.

Sewing basting stitches comes in handy for a beginner learning how to sew - Sew Me Your Stuff

After this I just stitched the bias tape and it was done!

Sewing basting stitches comes in handy for a beginner learning how to sew - Sew Me Your Stuff

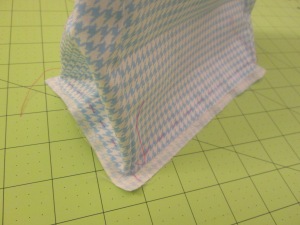
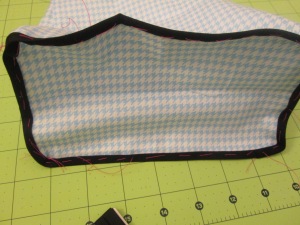
Here’s the bag after removing some of the basting. Note: Usually you use a thread that matches the bias tape, but I used materials that sharply contrasted on purpose for this demonstration!

Now some basic tips to make your basting easier:

  • Use a contrasting thread with your fabric so that you remember to remove it at the end!
  • Try to baste near your seamline rather than near the raw edge to mimic the real thing as closely as possible
  • Save your basting thread once you remove it so that you can reuse it later
  • Like I mentioned before, leave long ends free so that you don’t accidentally pull it through the fabric and lose the stitch
  • Find a way to store your excess thread by color. I use plastic bags and the thread does get tangled occasionally, but storing it by color makes it much easier to get what I need rather than going through a big knot of different colored threads.

Sewing basting stitches comes in handy for a beginner learning how to sew - Sew Me Your Stuff

Here are a couple of my basting bags!

Now go forth and baste away, opening doors to all kinds of sewing opportunities.

Happy sewing!
Learni.st – Learn how to sew starting from step one
Pinterest & Twitter – Follow for tips, ideas, and more
Etsy – Shop Sew Me Your Stuff

Sewing with Elastic: Elastic Casing

Hello sewists! Sorry for the hold up in posts – lent my camera to a friend for the weekend and just got it back. But now it’s time to get back to business by learning to use a new notion in your projects: sewing with elastic.

Sewing with elastic is a great skill to learn, and learning how to sew with elastic can be the first step in moving from beginner projects to more personalized crafts and garments. As mentioned in this earlier post, there are two ways to add elastic to your project. You can either insert it into a casing or sew it directly to your fabric.

In this post, we’ll cover the easier of the two: sewing an elastic casing.

I’m going to demonstrate by making a small bag with an elastic opening.

A bag with an elastic casing is an easy craft for a beginner learning how to sew elastic, a sewing notion - Sew Me Your Stuff

The first thing I did was to measure out a rectangular shape – about 14″ x 6 1/2″. That way my bag would be roughly 6″ x 6″ when completed. I only cut one piece of fabric to fold in half to use as the bag, but you can also cut two identical pieces to stitch together. The folded version is just easier!

A bag with an elastic casing is an easy craft for a beginner learning how to sew elastic, a sewing notion - Sew Me Your Stuff

Here is my cut out piece of fabric that will become a small bag! Next it’s time to fold it in half as I mentioned before.

A bag with an elastic casing is an easy craft for a beginner learning how to sew elastic, a sewing notion - Sew Me Your StuffA bag with an elastic casing is an easy craft for a beginner learning how to sew elastic, a sewing notion - Sew Me Your Stuff

If you’re using a fabric with a right side and a wrong side, fold right sides together. The fabric I’m using does not have a district wrong side, so it’s a little hard to tell in these pictures. But when you do this fold, the wrong side should be on the outside.

A bag with an elastic casing is an easy craft for a beginner learning how to sew elastic, a sewing notion - Sew Me Your Stuff

Press the fold in place so that all raw edges are even, including the sides and the opening. The fold will be the bottom of the bag. Next we will stitch the side seams.

A bag with an elastic casing is an easy craft for a beginner learning how to sew elastic, a sewing notion - Sew Me Your Stuff

The side seams are the raw edges perpendicular to the fold. Stitch, press, and trim the sides.

Now it’s time to look at your elastic. What is the width? Mine for this project is 1/2 inch. The width of your casing should be about 1/4 inch wider than your elastic band, so I’m going to do a casing that is 3/4 inches.

A bag with an elastic casing is an easy craft for a beginner learning how to sew elastic, a sewing notion - Sew Me Your StuffA bag with an elastic casing is an easy craft for a beginner learning how to sew elastic, a sewing notion - Sew Me Your Stuff

At the opening of your bag with wrong side out, measure the width of your elastic casing and press it down all around the bag.

A bag with an elastic casing is an easy craft for a beginner learning how to sew elastic, a sewing notion - Sew Me Your Stuff

Here is the pressed elastic casing. Remember, at this point your bag should be wrong side out.

A bag with an elastic casing is an easy craft for a beginner learning how to sew elastic, a sewing notion - Sew Me Your Stuff

Place two marks along the edge of your casing, approximately 2 inches apart. This will be the opening where you insert your elastic.

A bag with an elastic casing is an easy craft for a beginner learning how to sew elastic, a sewing notion - Sew Me Your StuffA bag with an elastic casing is an easy craft for a beginner learning how to sew elastic, a sewing notion - Sew Me Your Stuff

Next, stitch your casing shut starting at one mark all the way around to the second mark, but leaving the 2 inch opening unstitched.

A bag with an elastic casing is an easy craft for a beginner learning how to sew elastic, a sewing notion - Sew Me Your Stuff

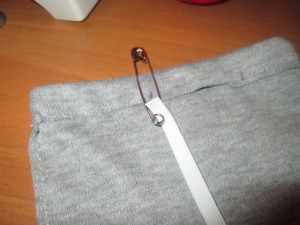
Attach a safety pin to one end of your elastic. Don’t attach it right to the end because it might get pulled off!

A bag with an elastic casing is an easy craft for a beginner learning how to sew elastic, a sewing notion - Sew Me Your StuffA bag with an elastic casing is an easy craft for a beginner learning how to sew elastic, a sewing notion - Sew Me Your Stuff

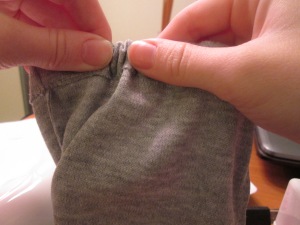
Push the elastic through the casing safety pin first, moving the fabric over the safety pin. Make sure your elastic does not get twisted in this process! When your safety pin has made it all the way around the bag, overlap the ends of your elastic. I’m making my elastic band a little shorter than the circumference of the bag so that the casing will have some bunch to it when finished.

A bag with an elastic casing is an easy craft for a beginner learning how to sew elastic, a sewing notion - Sew Me Your StuffA bag with an elastic casing is an easy craft for a beginner learning how to sew elastic, a sewing notion - Sew Me Your Stuff

Stitch the ends of your elastic together multiple times, backstitching several times. Trim the excess ends and push the elastic band fully into the casing.

A bag with an elastic casing is an easy craft for a beginner learning how to sew elastic, a sewing notion - Sew Me Your Stuff

Sew the 2 inch opening shut, with your elastic band fully enclosed in the casing.

A bag with an elastic casing is an easy craft for a beginner learning how to sew elastic, a sewing notion - Sew Me Your Stuff

And voila! You now have a bag with an elastic opening! This skill will come in handy for many projects, more than just simple bags!

Happy sewing!

Learni.st – Learn how to sew starting from step one
Pinterest & Twitter – Follow for tips, ideas, and more
Etsy – Shop Sew Me Your Stuff

How to Attach Non-Fusible Interfacing

Hello sewists! I’ve covered the usefulness of interfacing in this post, and earlier I shared a post about how to attach fusible interfacing, which you can view here.

However, not all interfacing is fusible. Some forms of interfacing are non-fusible and cannot be attached just using steam and heat.

Fusible interfacing is a really great tool for giving shape to your projects and doesn’t require being stitched onto fabric. Non-fusible interfacing is sometimes called “sew-in” interfacing because it doesn’t have an adhesive side like fusible interfacing does and has to be attached by being sewn to the fabric.

The process of attaching non-fusible interfacing differs a little bit from attaching fusible interfacing, so here’s a guide to using non-fusible interfacing to give a project some shape.

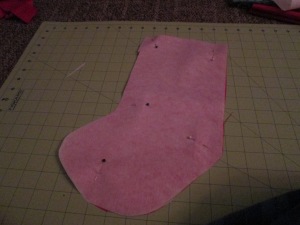
First, you’ll want to cut out your pattern pieces. I’m demonstrating on a Christmas stocking, and I’m attaching interfacing to the lining so that it holds the stocking shape.

Learning the difference between fusible and non-fusible interfacing and how to attach each is important for a beginner learning to sew with sewing notions - Sew Me Your Stuff

Notice that I cut out the interfacing to be the exact same size as the fabric piece. When cutting out fusible interfacing you also cut it to be the same size at first. However, non-fusible is different in that you don’t trim the edges before attaching.

Learning the difference between fusible and non-fusible interfacing and how to attach each is important for a beginner learning to sew with sewing notions - Sew Me Your Stuff

Pin the interfacing to the fabric, matching the raw edges.

Tip: Notice that my pins are not right along the raw edge like you normally do when pinning together two pieces of fabric. I also used as few pins as possible. This is because the interfacing is very thick and can get distorted easily with the pins. I removed the pins as I stitched to keep the edges as even as possible.

Before you stitch, you should have decided how wide your seam allowance will be. When you stitch the interfacing onto the fabric, you’ll want to use a slightly shorter seam allowance so that the interfacing will definitely be stitched into your seam.

For example, I typically use a 1/2 inch seam allowance. So for this piece of fabric, I’ll be using a 3/8 inch seam allowance when attaching my interfacing.

Learning the difference between fusible and non-fusible interfacing and how to attach each is important for a beginner learning to sew with sewing notions - Sew Me Your Stuff

Stitch the interfacing onto the fabric as a normal straight stitch.

Learning the difference between fusible and non-fusible interfacing and how to attach each is important for a beginner learning to sew with sewing notions - Sew Me Your Stuff

After you stitch the interfacing onto the fabric, trim the interfacing very close to the stitch to reduce bulk in your seams. This is why you have to use a shorter seam allowance rather than one that is the same length that you normally use. After you trim your interfacing, you can still be sure that it will be in your line of stitching and give your fabric a smooth look.

Learning the difference between fusible and non-fusible interfacing and how to attach each is important for a beginner learning to sew with sewing notions - Sew Me Your StuffLearning the difference between fusible and non-fusible interfacing and how to attach each is important for a beginner learning to sew with sewing notions - Sew Me Your Stuff

Now your interfacing is attached directly to the fabric. Remember that non-fusible interfacing is different from fusible in that when attaching fusible, you trim the edges before you attach. As you can see with the non-fusible interfacing, you trim  after you attach.

Next I repeated this process on the matching piece of fabric and stitched the two together to form the lining of the stocking. When I stitch the seam, notice that the seam stitch is slightly deeper than the stitch used to attach the interfacing.

Learning the difference between fusible and non-fusible interfacing and how to attach each is important for a beginner learning to sew with sewing notions - Sew Me Your Stuff

The stitch closer to the raw edge is the stitch used to attach the interfacing, and the deeper stitch is the seam.

All in all, non-fusible interfacing is no more difficult to attach than fusible. I tend to prefer fusible because you don’t have to use as much thread and it sticks directly to the fabric. When stitching my non-fusible interfacing, I had trouble with the fabric and interfacing becoming separated and throwing off my stitches which isn’t a problem I have with fusible.

Remember to use the interfacing guide at your fabric store if possible to pick the right interfacing for your project!

Learni.st – Learn how to sew starting from step one
Pinterest & Twitter – Follow for tips, ideas, and more
Etsy – Shop Sew Me Your Stuff

September/October 2012 Summary

Hello sewists! It’s November, which means it’s time to put the shorts away and stay warm inside while you get started on some Christmas crafts! If you’ve fallen behind on Sew Me Your Stuff posts, here’s a recap of what’s been covered the last couple of months.

Need to go back further? Past recaps:

Sewing Patterns:

Sewing Machine Help:

Notions and other Tools:

A Bag’s Life:

Remember, if you ever would like to see a topic covered by Sew Me Your Stuff, just submit it here!

Learni.st – Learn how to sew starting from step one
Pinterest & Twitter – Follow for tips, ideas, and more
Etsy – Shop Sew Me Your Stuff

Helpful Link: Sewing Patterns are Your Friend

I came across this blog post on Pinterest and thought it was absolutely great. I have covered how to use sewing patterns in a few past posts: Choosing a sewing pattern, A Bag’s Life parts 1 2 & 3, and this video on reading patterns.

I loved this blog post though and really wanted to share it. If you’re ever in a jam, it’s a helpful guide to reading all those numbers on the back of the sewing pattern.

Click the image to read: Tales of a Trophy Wife: Sewing 101: Patterns are your Friends

Learning how to use sewing patterns is important for beginners learning to sew - Sew Me Your Stuff

Happy sewing!

Learni.st – Learn how to sew starting from step one
Pinterest & Twitter – Follow for tips, ideas, and more
Etsy – Shop Sew Me Your Stuff

A Bag’s Life Part 3: The Construction

And now the epic conclusion to the Sew Me Your Stuff saga of how to go from pattern to product – Market Tote Edition.  This post detailed the process of choosing an easy pattern for a beginner and finding notions in the store. This post will guide you through understanding the pattern and setting it up to get started. Now it’s time to learn how to turn that pattern into a finished craft!

The last step mentioned in the previous post was cutting out the pattern pieces needed for your project. The next step will be to trace the pieces onto fabric, but there’s a little preparation before you do that.

Learning how to use a sewing pattern to make a craft is important for beginners learning to sew - Sew Me Your Stuff

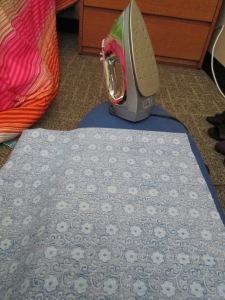
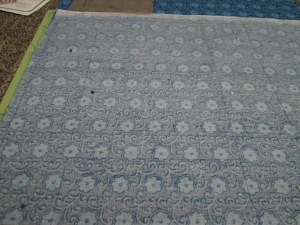
First, you’ll need to iron the fabric to smooth out any wrinkles. Wrinkles can distort the traced pattern and cause your final product to be pretty wonky. This fabric that I’m using I picked from the home decor section of the fabric store, and it’s a simple woven cotton. I highly recommend a fabric like this for a beginner’s craft. It was great to work with!

Learning how to use a sewing pattern to make a craft is important for beginners learning to sew - Sew Me Your Stuff

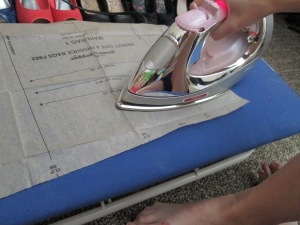
Next you have to flip your iron to a low setting and press your pattern pieces flat. The folds and creases in the paper can also distort your lines, so it’s very important that you completely flatten the pattern piece.

Learning how to use a sewing pattern to make a craft is important for beginners learning to sew - Sew Me Your Stuff

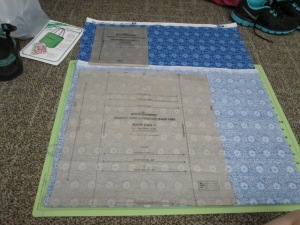
Before you begin tracing, lay the pattern pieces on the fabric to be sure that you’re leaving yourself enough fabric for both pieces. The pattern instructions will often contain a guide to laying the pieces that you can use to help you with this step.

Learning how to use a sewing pattern to make a craft is important for beginners learning to sew - Sew Me Your Stuff

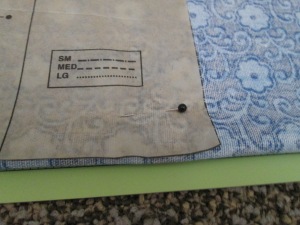
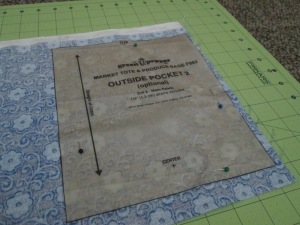
To help you trace the pattern accurately, you should pin the pattern to the fabric. If your fabric is folded, pin the pattern through all layers. This thin paper can easily be shifted while tracing, but pins will hold it in place.

Learning how to use a sewing pattern to make a craft is important for beginners learning to sew - Sew Me Your Stuff

Next it’s time to actually trace the pattern. Because all of the edges are straight, I used a ruler to guide me. This isn’t always possible, but if you can then it will help you keep your lines accurate.

Learning how to use a sewing pattern to make a craft is important for beginners learning to sew - Sew Me Your Stuff

You can see in this picture that I completely traced the outline of the pattern, but very importantly I also traced the markings on the pattern that indicate where the pocket and straps should go. Make sure you transfer all markings from the pattern to the fabric!

Learning how to use a sewing pattern to make a craft is important for beginners learning to sew - Sew Me Your Stuff

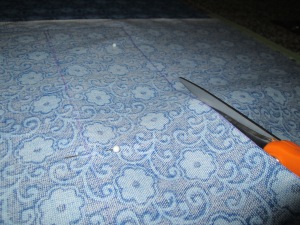
Next it’s time to cut! With all the extra markings on the fabric, be sure you only cut the lines that you’re supposed to.

Learning how to use a sewing pattern to make a craft is important for beginners learning to sew - Sew Me Your Stuff

Repeat this process for all pattern pieces. It may be most time-effective to trace all pieces and then cut all pieces, but because of the layout of these pieces I decided to do them separately.

Learning how to use a sewing pattern to make a craft is important for beginners learning to sew - Sew Me Your Stuff

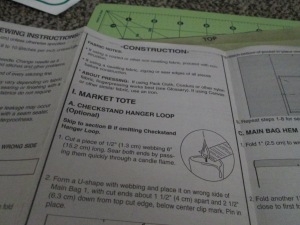
From here on out I’ll be following the instructions included in the sewing pattern. It’s very important that you start with the first step and follow the instructions carefully. (I actually skipped the checkstand hanger loop)

Learning how to use a sewing pattern to make a craft is important for beginners learning to sew - Sew Me Your Stuff

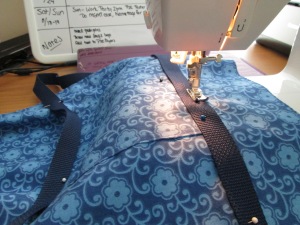
Midway through the process. Webbing straps are pretty easy to sew! Notice that all pins are perpendicular to the path of the sewing machine. Most sewing machines can tolerate horizontal pins like this, but if your pins are vertical it can damage your sewing machine!

Learning how to use a sewing pattern to make a craft is important for beginners learning to sew - Sew Me Your Stuff

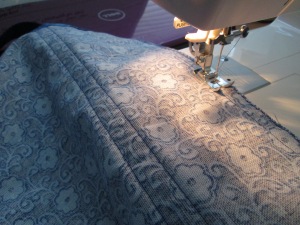
Sewing the side seams. I had some crookedness in my stitches, but this fabric was very easy to move through the machine.

Learning how to use a sewing pattern to make a craft is important for beginners learning to sew - Sew Me Your Stuff

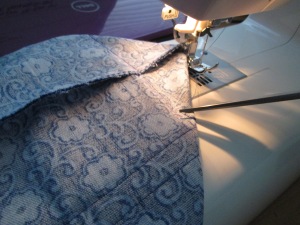
Cutting the last stitch!

Learning how to use a sewing pattern to make a craft is important for beginners learning to sew - Sew Me Your Stuff

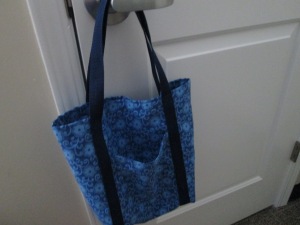
And voila! We have a bag!

Hopefully this series has helped you see how easy it is to go from cutting the pattern to putting your new tote bag (or other craft) to work. You can really surprise yourself with what you’re capable of making once you get the hang of sewing!

Learni.st – Learn how to sew starting from step one
Pinterest & Twitter – Follow for tips, ideas, and more
Etsy – Shop Sew Me Your Stuff

A Bag’s Life Part 2: The Pattern

In a previous post I detailed the hunt for a simple project pattern at the fabric store. Now it’s time to look at how to use the sewing pattern, first by reading and interpreting it.

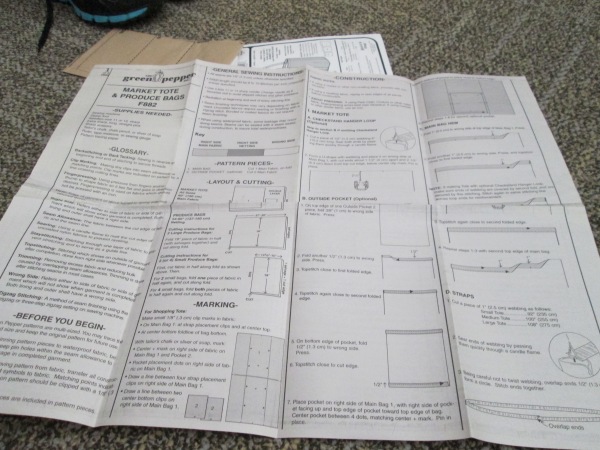
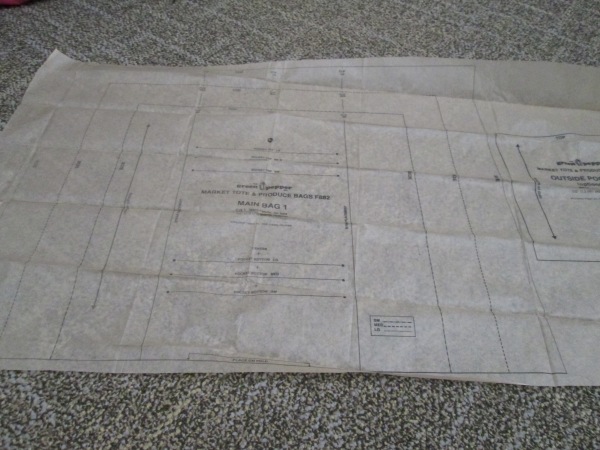
When you open a new pattern, it will have two things in it: instructions, and the pattern printed on drafting paper.

Before you start trying to cut out the pattern, let’s first look at the instructions.

Learning how to use a sewing pattern to make a craft is important for beginners learning to sew - Sew Me Your Stuff
It is very important to closely read all of the sewing instructions that accompany a pattern, not just the step-by-step. They will typically define unfamiliar terms, specify the width of the seam allowance, and tell you important tips that might be omitted from the step-by-step instructions. Notice under “Layout & Cutting” in the picture (click the image to enlarge) the pattern illustrates how to lay out the pattern pieces on your fabric to trace. This pattern is pretty simple, but that is really helpful for more complex projects or projects where you have to consider the grainline.

After you have studied the instructions, it’s time to look at the pattern pieces.

Learning how to use a sewing pattern to make a craft is important for beginners learning to sew - Sew Me Your Stuff

This bag can be produced in a small, medium, or large size, so the pattern has three different lines outlining the body of the bag that you can trace depending on the size of the bag that you want. The second piece of the pattern, the pocket, comes in only one size.

If you have a pattern that gives you multiple sizing options, be extra careful when cutting to be sure that you are being consistent. Many clothing patterns are printed in 6 or 8 sizes at once, so it takes some focus to make sure that you don’t mix up the lines and start cutting out the wrong size. However, once you get more advanced you may want to intentionally blend sizes to fit your body or tastes better – until then just stick to one size at a time!

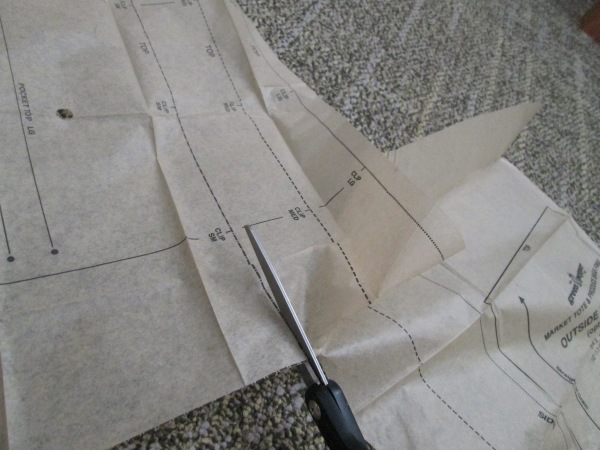
I’ve decided that I only want a small bag, so it’s time for me to start cutting.

Learning how to use a sewing pattern to make a craft is important for beginners learning to sew - Sew Me Your Stuff

Notice that my scissors are cutting along the “small” dotted line. Alternatively, I could have cut along one of the bigger lines and simply maneuvered to trace the “small” line, but I decided to keep it simple.

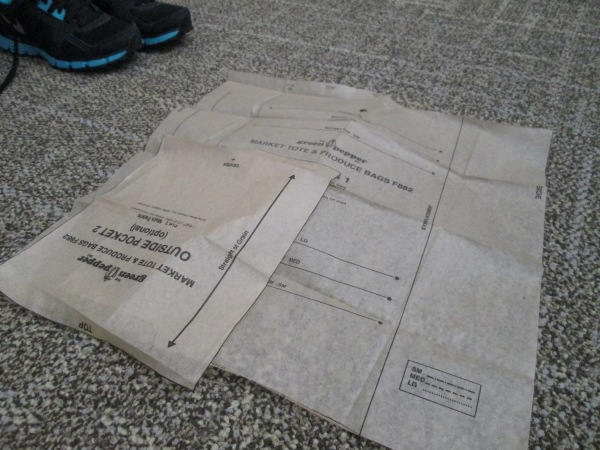
And here are my cut out pieces!

Learning how to use a sewing pattern to make a craft is important for beginners learning to sew - Sew Me Your Stuff

In the next post, I’ll show how these two pieces of paper turn into a cute tote bag!

Learni.st – Learn how to sew starting from step one
Pinterest & Twitter – Follow for tips, ideas, and more
Etsy – Shop Sew Me Your Stuff